Building cross-platform applications with a single codebase is possible, thanks to .NET MAUI. In this blog, you will learn how to add authentication to .NET MAUI apps. Authentication is a process of validating users through their credentials. .NET MAUI apps use Azure AD on different platforms to authenticate users. For the authorization process, they utilize MSAL to request access tokens, which helps authorize signed-in users for backend services. When you hire a reliable .NET development company to build an app, they implement appropriate security measures such as authentication and authorization processes to ensure the safety of the .NET application and its data. Let’s understand these concepts before proceeding with a step-by-step guide to .NET MAUI authentication.
1. Overview of .NET MAUI Authentication
The authentication process involves verifying a user’s identity through credentials such as a username and password. When users attempt to access specific information, they must present their credentials to an authority for validation. The authorization process begins if the user is validated to determine whether the user has permission to access the requested resource or information.
You can easily integrate authentication and authorization processes in your .NET MAUI app that communicates with the ASP.NET web apps. This can be achieved using various solutions, such as authentication middleware, ASP.NET Core Identity, and external authentication providers like Google, Twitter, Microsoft, and Facebook. A containerized identity microservice using IdentityServer handles the authentication and authorization processes in the .NET MAUI application.
When a request is made to access a specific resource or authenticate a user, the app requests security tokens from IdentityServer. The IdentityServer can issue a security token on behalf of users only if they are signed in.
However, we need to use the ASP.NET Core Identity for authentication because IdentityServer lacks a database and a user interface. The app initiates the authentication process when it needs to determine the current identity of the user. Let us see how we can add authentication to the .NET MAUI application.
2. How To Set Up Your Azure AD Environment?
Let us see the tools and technologies you will require to create a .NET MAUI program and add authentication to the application.
- Visual Studio installed.
- .NET MAUI installed.
- Android device or emulator setup.
2.1 Create an Azure AD Tenant
- You need to create an Azure Active Directory (Azure AD) tenant if you don’t have one. Start by signing in to the Microsoft Entra Admin Center.
- Open the Azure Active Directory. Go to the Manage Tenants section, and click the Create button.
- Now, you can see the instructions for setting up a new Azure AD tenant on your screen. Follow these instructions to create one.
- Note the Tenant ID after creating the Azure AD tenant, as it is required during the configuration of your MAUI application.
2.2 Register Your MAUI Application
- To add authentication, you need to register your application in the Azure portal first.
- Open Azure Active Directory, navigate to App Registrations and click on New Registrations.
- Provide a suitable name for your .NET MAUI application.
- Depending on your requirements, select the appropriate options, such as Accounts in this same organizational directory.
- Click on the Register and note the Application (Client) ID assigned to your app.
2.3 Configure Redirect URIs
- The platform-specific redirect URIs need to be configured because MAUI is cross-platform.
- Go to the App Registration in the Azure Portal and click on Authentication.
- Find the option for Redirect URIs to add suitable URIs for every platform as shown below:
- Android: msal{ApplicationClientId}://auth
- iOS/macOS: msal{ApplicationClientId}://auth
- Windows: http://localhost (for development)
- If you are thinking about using authentication for desktop versions of your application, then you need to select the Web platform.
3. Installing MSAL.NET in Your MAUI Project
The MSAL.NET library provides authentication and token management capabilities making it easier to integrate Azure AD authentication with your .NET MAUI application.
3.1 Install MSAL.NET via NuGet
- Use NuGet Package Manager to add the MSAL.NET package to your project.
- Open Visual Studio and load your .NET MAUI project.
- To access the Package Manager Console (Tools → NuGet Package Manager → Package Manager Console).
Now, run the code given below:
Install-Package Microsoft.Identity.Client |
Another option is to use the NuGet Package Manager UI:
- Right-click your MAUI project in Solution Explorer.
- Select Manage NuGet Packages.
- Search for Microsoft.Identity.Client.
- Click Install to add the package.
3.2 Verify Installation
Run the following code to verify whether the package is added to your .csproj file:
<ItemGroup> <PackageReference Include="Microsoft.Identity.Client" Version="latest-version" /> </ItemGroup> |
4. Configuring Platform-Specific Settings for MSAL Authentication in .NET MAUI
For proper handling of authentication redirects, we need to configure the platform-specific settings after installing the MSAL.NET configurations that differ across platforms to support Azure AD authentication callbacks.
4.1 iOS: Configure Info.plist For Authentication Callbacks
To manage the authentication responses on iOS, you need to register a custom URL scheme. Here’s how you should configure iOS:
Open Platforms/iOS/Info.plist.
Add the following inside the <dict> tag:
<key>CFBundleURLTypes</key> <array> <dict> <key>CFBundleURLSchemes</key> <array> <string>msal{Your_Client_ID}</string> </array> </dict> </array> |
Fetch the Application (Client) ID from the Azure AD to replace it with {Your_Client_ID}. Make sure that the Azure AD’s Redirect URI for iOS matches the scheme:
msal{Your_Client_ID}://auth
- (E.g., msal12345678-abcd-1234-efgh-9876543210ab://auth)
- Save the file and rebuild your project.
4.2 Android: Configure AndroidManifest.xml For Authentication Redirects
To redirect the authentication response back to your app on Android devices, you must define intent filters. Configure Android in the following way:
Open Platforms/Android/AndroidManifest.xml.
Add the given intent filter below in the <activity> tag for your MainActivity.
<activity android:name="microsoft.identity.client.BrowserTabActivity"> <intent-filter> <action android:name="android.intent.action.VIEW" /> <category android:name="android.intent.category.DEFAULT" /> <category android:name="android.intent.category.BROWSABLE" /> <data android:scheme="msal{Your_Client_ID}" android:host="auth" /> </intent-filter> </activity> |
Replace {Your_Client_ID} with your Azure AD Application ID and make sure that the Redirect URI for Android in Azure AD matches:
msal{Your_Client_ID}://auth |
4.3 Windows: Configure Redirect URI in Package Manifest
Register the redirect URI in the package manifest of your application for Windows authentication. Take the following steps to configure Windows:
Go to the XML editor to open the Platforms/Windows/Package.appxmanifest. Find the <Extensions> tag and make sure that it contains the below declaration:
<Extensions> <Extension Category="windows.protocol"> <Protocol Name="msal{Your_Client_ID}" /> </Extension> </Extensions> |
Replace {Your_Client_ID} with your Azure AD Application ID and ensure that Azure AD’s Redirect URI for Windows is:
In the end, save the file and rebuild your project.
The table below provides a summary of the platform-specific required configurations.
| Platform | Required Configuration |
|---|---|
| iOS | Add CFBundleURLSchemes in Info.plist |
| Android | Add intent filter in AndroidManifest.xml for authentication callbacks |
| Windows | Register a protocol handler in Package.appxmanifest |
Making these necessary changes to the settings ensures that Azure AD’s authentication responses are properly managed on each platform.
5. Initializing MSAL in Your .NET MAUI App
Start the MSAL Public Client Application to authenticate users with Azure AD. It helps you handle authentication requests, token retrieval, and sign-in flows.
5.1 Create a PublicClientApplication Instance
Initialize the MSAL in your .NET MAUI application using the following parameters:
- Client ID (from Azure AD app registration)
- Authority (Azure AD Tenant endpoint)
- Redirect URI (specific to each platform)
To initialize the MSAL, add the code given below inside your authentication service, such as AuthService.cs.
using Microsoft.Identity.Client; public class AuthService { private static IPublicClientApplication _pca; public AuthService() { pca = PublicClientApplicationBuilder.Create("YourClient_Id") .WithAuthority("https://login.microsoftonline.com/Your_Tenant_Id") .WithRedirectUri(GetRedirectUri()) .Build(); } private string GetRedirectUri() { return DeviceInfo.Platform switch { DevicePlatform.Android => $"msalYour_Client_Id://auth", DevicePlatform.iOS => $"msalYour_Client_Id://auth", DevicePlatform.WinUI => "https://login.microsoftonline.com/common/oauth2/nativeclient", _ => throw new PlatformNotSupportedException() }; } } |
Now, replace the following placeholders:
- “Your_Client_Id” → Your Azure AD Application (Client) ID
- “Your_Tenant_Id” → Your Azure AD Tenant ID
- Depending on the platform, like Windows, iOS, and Android, the redirect URIs are selected dynamically.
5.2 Store and Reuse the MSAL Instance
It is important to store the MSAL instance globally because the authentication occurs multiple times in the .NET application. You can register for the authentication service by modifying the MauiProgram.cs file.
using Microsoft.Identity.Client; public static class MauiProgram { public static MauiApp CreateMauiApp() { var builder = MauiApp.CreateBuilder(); builder .UseMauiApp<App>() .Services.AddSingleton<AuthService>(); return builder.Build(); } } |
After making modifications, you can inject the AuthService anywhere in your application. Now, take the following steps:
- Sign-in users using AcquireTokenInteractive.
- Handle authentication tokens.
- Securely store & refresh access tokens.
6. Implementing Authentication Logic in .NET MAUI with MSAL.NET
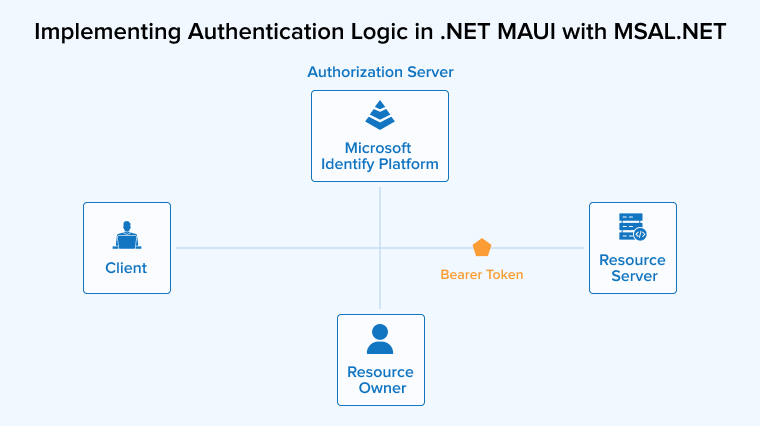
After initializing the MSAL in AuthService, use AcquireTokenSilent and AcquireTokenInteractive to implement the sign-in flow and token management.
6.1 Sign-In: Prompt User For Authentication
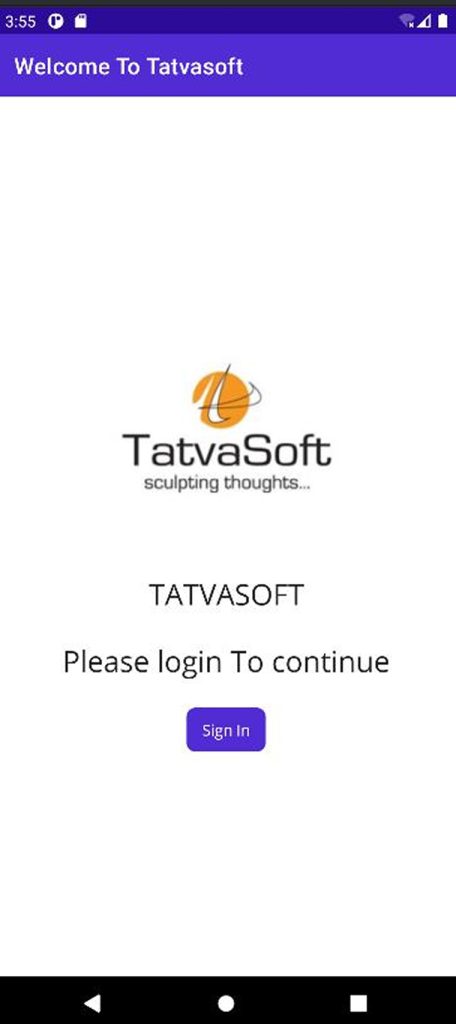
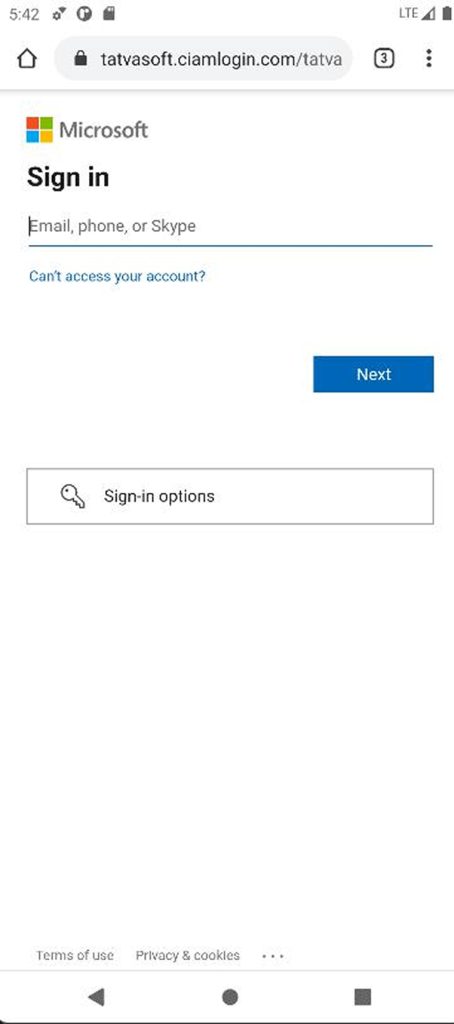
Open a web-based login prompt using the AcquireTokenInteractive method that allows users to sign in to Azure AD. The code below shows how to implement Sign-In in AuthService.cs:
using Microsoft.Identity.Client; public class AuthService { private readonly IPublicClientApplication _pca; private readonly string[] _scopes = new[] { "User.Read" }; // Define required API scopes public AuthService() { pca = PublicClientApplicationBuilder.Create("YourClient_Id") .WithAuthority("https://login.microsoftonline.com/Your_Tenant_Id") .WithRedirectUri(GetRedirectUri()) .Build(); } private string GetRedirectUri() { return DeviceInfo.Platform switch { DevicePlatform.Android => $"msalYour_Client_Id://auth", DevicePlatform.iOS => $"msalYour_Client_Id://auth", DevicePlatform.WinUI => "https://login.microsoftonline.com/common/oauth2/nativeclient", _ => throw new PlatformNotSupportedException() }; } public async Task<AuthenticationResult> SignInAsync(object parentWindow) { try { var result = await pca.AcquireTokenInteractive(scopes) .WithParentActivityOrWindow(parentWindow) .ExecuteAsync(); return result; } catch (MsalException ex) { Console.WriteLine($"Authentication failed: {ex.Message}"); return null; } } } |
Key Notes:
- Replace “Your_Client_Id” and “Your_Tenant_Id” with your actual Azure AD values.
- The API permissions required here are defined by scopes.
- Ensure proper UI display for authentication using the WithParentActivityOrWindow (parentWindow).
6.2 Token Management: Silent Authentication
MSAL caches tokens automatically. So there is no need to prompt the users. You can easily retrieve tokens again using the AcquireTokenSilent method without asking users to log in again. Use the following code to apply Silent Token Acquisition:
public async Task<AuthenticationResult> GetTokenSilentlyAsync() { try { var accounts = await _pca.GetAccountsAsync(); if (!accounts.Any()) return null; // No cached accounts, user needs to sign in var result = await pca.AcquireTokenSilent(scopes, accounts.FirstOrDefault()) .ExecuteAsync(); return result; } catch (MsalUiRequiredException) { Console.WriteLine("Silent token acquisition failed, user interaction required."); return null; } catch (Exception ex) { Console.WriteLine($"Token retrieval error: {ex.Message}"); return null; } } |
Key Notes:
- Whenever possible, the cached tokens are retrieved using the AcquireTokenSilent.
- Catch MsalUiRequiredException to manage session expiry. This means you will need a re-authentication.
6.3 Logging Out: Clearing Cached Tokens
Remove the cached tokens and sign out the user for full sign-out.
public async Task SignOutAsync() { var accounts = await _pca.GetAccountsAsync(); foreach (var account in accounts) { await _pca.RemoveAsync(account); } } |
7. Handle Authentication-Results
Here we will explore how Authentication-Results can be used to secure API calls in .NET MAUI with MSAL.NET.
7.1 Securing API Calls in .NET MAUI with MSAL.NET
After successfully implementing Sign-In, Silent Authentication, and Sign-Out, we will move on to perform the following activities:
- Extracting user information from the authentication result.
- Using the acquired token for secure API calls.
- Testing the authentication flow on multiple platforms.
Once authentication is successful, use AuthenticationResult to obtain important information, such as the access token used to authenticate the API requests, as well as user information like account details and usernames.
7.2 Extracting User Info
Let’s see how you can modify the SignInAsync method to retrieve user information.
public async Task<string> SignInAsync(object parentWindow) { try { var result = await pca.AcquireTokenInteractive(scopes) .WithParentActivityOrWindow(parentWindow) .ExecuteAsync(); if (result != null) { var userName = result.Account.Username; Console.WriteLine($"User signed in: {userName}"); return userName; } } catch (MsalException ex) { Console.WriteLine($"Authentication failed: {ex.Message}"); } return null; } |
Key Notes: The UPN or email of the signed-in user can be retrieved using the result.Account.Username method. You can use this information for personalization.
8. Secure API Calls with Access Tokens
Attach the access token with the request header when you call a protected API. The code below shows how to make a secure API request.
using System.Net.Http; using System.Net.Http.Headers; public async Task<string> CallSecureApiAsync() { var result = await GetTokenSilentlyAsync(); if (result == null) { Console.WriteLine("User needs to sign in again."); return null; } using var httpClient = new HttpClient(); httpClient.DefaultRequestHeaders.Authorization = new AuthenticationHeaderValue("Bearer", result.AccessToken); var response = await httpClient.GetAsync("https://graph.microsoft.com/v1.0/me"); if (response.IsSuccessStatusCode) { return await response.Content.ReadAsStringAsync(); } else { Console.WriteLine($"API Call Failed: {response.StatusCode}"); return null; } } |
Key Notes:
- The access token is attacked by the httpClient.DefaultRequestHeaders.Authorization.
- The example calls the Microsoft Graph API (/me) to fetch user details.
- Replace “https://graph.microsoft.com/v1.0/me” with your own API endpoint.
9. Testing Your Authentication Implementation
We need to run tests before the app deployment to ensure that the authentication flow functions correctly on all targeted platforms.
- Android: Run the app on a physical device or emulator and test sign-in/sign-out.
- iOS: Run on a simulator or real device to verify redirect handling.
- Windows: Debug authentication on Windows 11 (ensure redirect URIs are configured correctly).
- Cross-Platform Tests: Check if tokens persist across app restarts.
Debugging Tips:
- Check redirect URIs in Azure AD in case the sign-in fails.
- Verify scopes in Azure AD if API calls return 401 Unauthorized.
- Confirm that AcquireTokenSilent() is implemented when the tokens are not being cached.
10. Conclusion
In this article, we saw a step-by-step guide to adding authentication to a .NET MAUI application using Azure across various platforms, such as Windows, iOS, and Android. We also saw how to test authentication implementation, secure API calls, and handle user authentication results. If you have any queries then feel free to contact our experts for further guidance.





Comments
Leave a message...