
Developers face difficulties in managing the state changes within a complex JavaScript-based application. But that problem is resolved with Redux, a state management library that offers a method to make predictable and immutable state changes. However, the solution is very verbose, it needs a large amount of boilerplate code for its effective implementation. Redux Toolkit was launched to overcome these issues with Redux. Nowadays, developers are facing a dilemma about whether to use Redux vs Redux Toolkit for their projects.
However, a Reactjs development company carefully analyzes the requirements of the client before deciding on their tech stack. Apart from that, the preferences of the development team also play a significant role. You can’t make an informed decision if you aren’t well-informed about your options. So, this article on Redux vs Redux Toolkit provides an overview of the basic concepts and workings of both contenders.
1. Overview of Redux
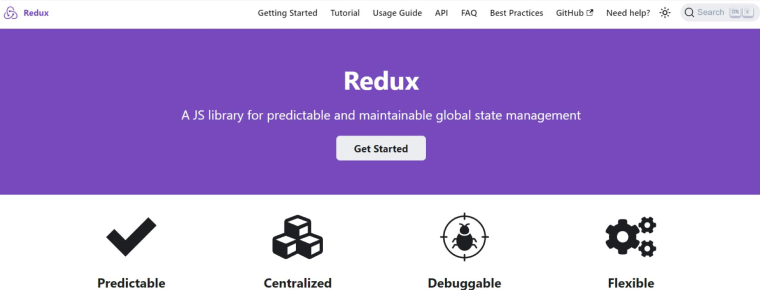
Andrew Clark and Dan Abramov built Redux in 2015. It is a state management library that helps you handle the state of your Java app predictably and efficiently. Redux follows the principles of functional programming and utilizes a flux architecture.
The data flow in Redux is unidirectional. It has a centralized store to manage the state of the application along with actions and reducers for managing the state changes.
In Redux, the existing state objects are never directly modified during updates. Instead, it creates a new state object which aids in tracking changes in the state and debugging the app. This is possible because Redux has a single and immutable state tree as one of its key features.
The middleware of Redux allows you to add more features such as persistence, asynchronous actions, logging, and more to extend Redux’s capabilities.
2. Advantages of Redux
Redux is popular for simplifying the state management process. It is just one of many benefits of using Redux.
2.1 Centralized State Management
Handling and accessing the data across different components of the application is easy with Redux. It provides a centralized state management system called Store, which stores the Redux state and allows the components to access any necessary state. This is the reason behind many developers prefer to use the Redux store when working on large and complex applications.
2.2 Easy Debugging
In the debugging process, developers used to track the state changes that are the source of the problem. But this could be overwhelming especially if you are working on large and complex projects that have undergone a lot of state changes. However, finding and fixing the issues in your app can be made easier with Redux DevTools, as it records each change made to the state of your application. This feature saves a lot of your time and effort.
2.3 Optimized Performance
The performance of your app is improved as Redux reduces the need for prop drilling and minimizes the number of state updates. It does so by eliminating unnecessary re-renders. The centralized store triggers re-renders in components only when changes are made to its data.
2.4 Strong and Helpful Community
This library has a very large user base. So, whenever you feel stuck or face any problem, you can easily seek assistance from the community. Moreover, the community has contributed to the growth of this state management library by providing necessary documentation and extensions. These resources can help you simplify the code logic and enhance the performance of your application.
3. Redux Features
The key features of the Redux library include:
3.1 Middleware
As a testing feature of the Redux library, Middleware tests all the actions before passing them on to the store. It can easily modify as well as generate more actions. Middleware is one of the most robust features of Redux.
3.2 Unidirectional Flow
The flow of data is unidirectional in the Redux library. So, the state changes can only happen through actions within Redux. This setup grants you control over how changes are made to the state and how to respond to the user’s actions. The unidirectional flow also makes the state changes predictable.
3.3 Single Immutable State Tree
All the states of your React application are stored in a single immutable tree, making it easy to track all changes. Being one of the key features of the Redux, this state tree makes sure that all application states are predictable and consistent.
3.4 DevTools
As a library, Redux provides a wide range of developer tools. These React developer tools are extremely helpful in debugging and profiling your apps.
4. How Redux Works
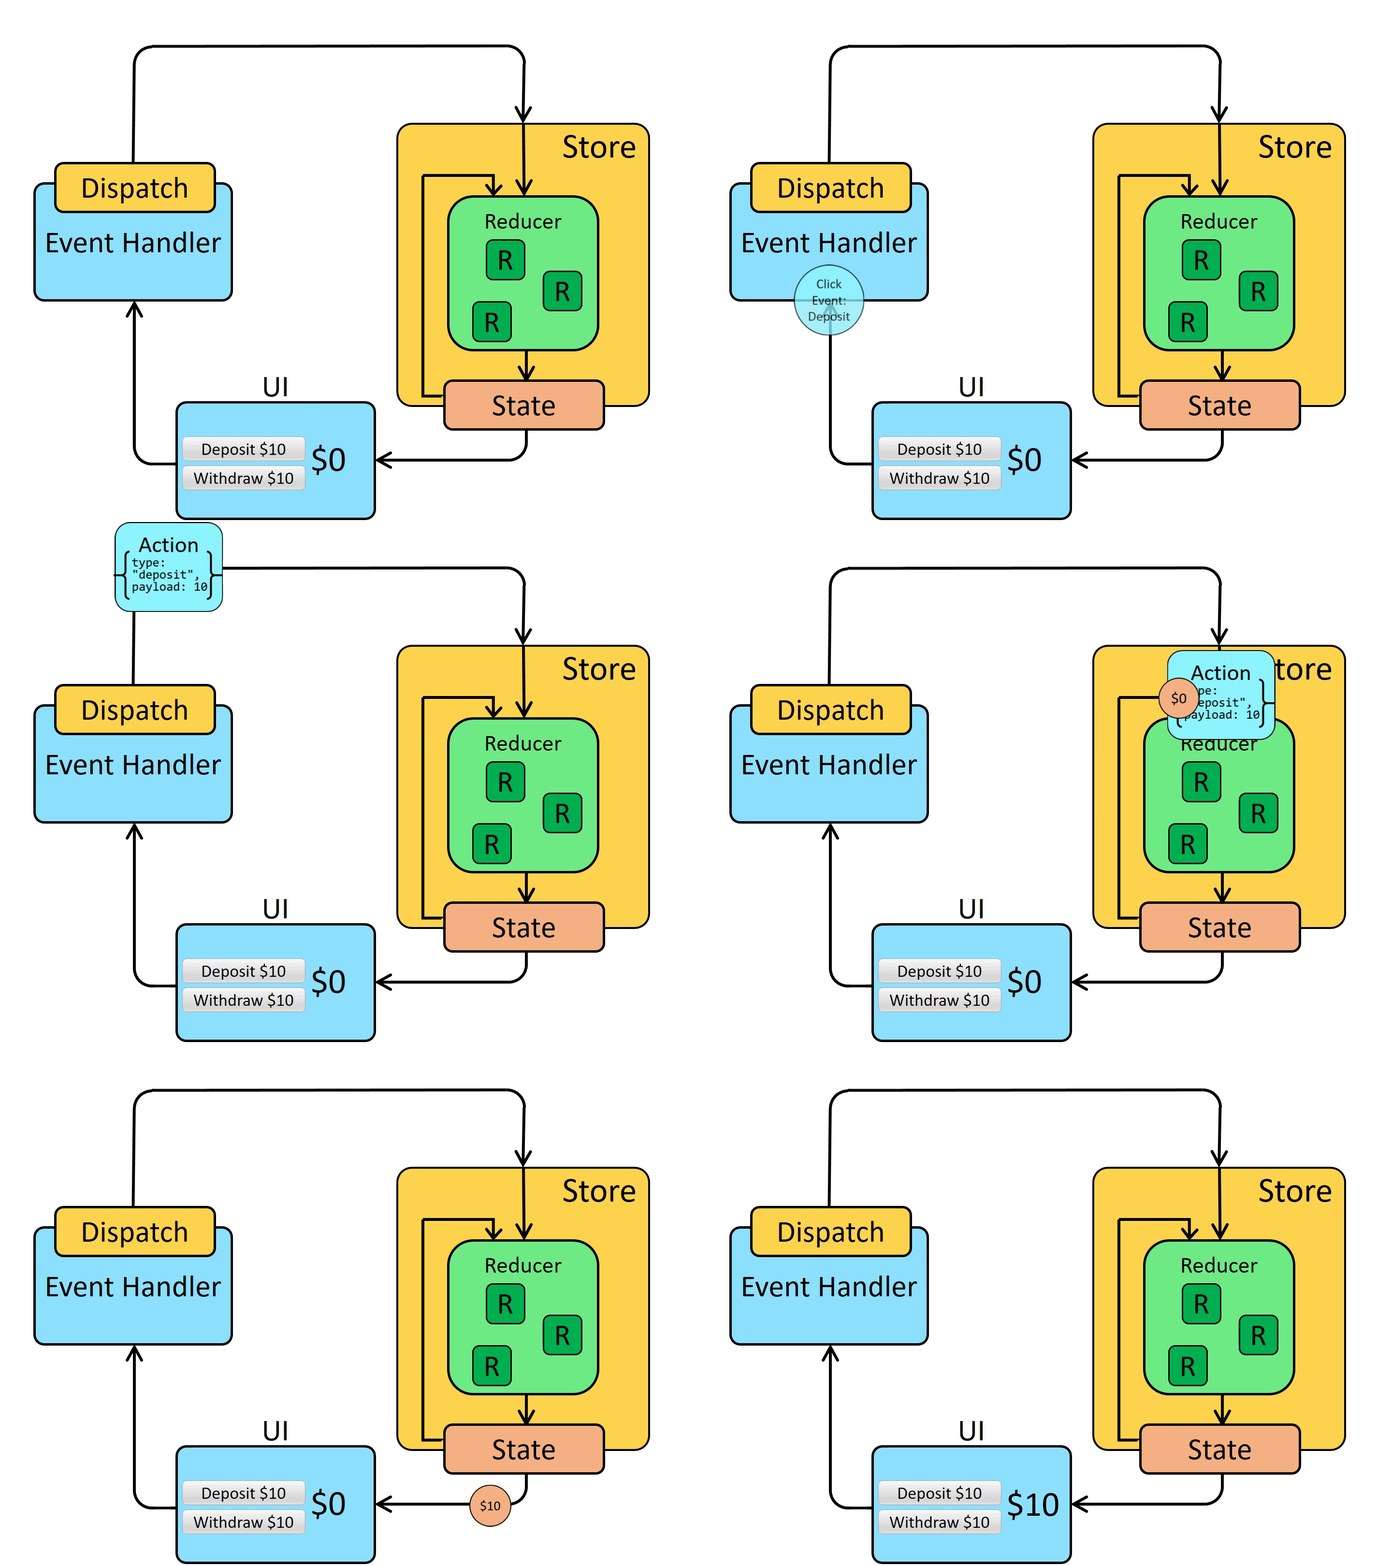
Handling the app state becomes easy with Redux. However, four components play a critical role in the entire process. Let’s go through them one by one.
4.1 The Store
The Store is a centralized state management system for Redux. It functions as a storage unit for all the data in your application, which is categorized into different types like numbers, strings, objects, and functions. Redux stores these data all in a compartmentalized manner.
Referred to as the single source of truth, the store allows the components to access or retrieve the data across the entire application. When changes take place in the state, the store is responsible for notifying all the listeners. It also sends the actions to the middleware, which then forwards them to the reducers.
4.2 Actions
Redux is a set of plain JavaScript objects. Among these, there is an object called action that determines the changes that need to be done in the state of the application. It helps update the store by sending the necessary data.
This object describes the actions that need to be performed using a “type” property, which is defined as a constant string to prevent errors and ensure uniformity. Additionally, an action can also contain a “payload” property which provides information regarding how to perform the given action.
Let’s take an example of the ADD_TO_CART action type. The payload here is the object with the new task item’s “id”, ”productId”, and “itemCount”, The code for this action will look like below:
{ type: ADD_TO_CART', payload: { id: 1, productId: 'prod-953asx-487sds-gkl127', itemCount: 3 } } |
In the given scenario, actions are created and returned using the functions called action creators. In the above example, if the action creator receives the text of the task and produces the action object that needs to be added to the store, the action creator function would be:
function addToCart(cartItemCount, productId) { return { type: 'ADD_TO_CART', payload: { id: 1, itemCount:cartItemCount, productId } } } |
4.3 Dispatch
You can also update your app’s state by sending an action through the dispatch function provided by the store. Calling dispatch will prompt the store to run action through all the available reducers. As a result, the state of your app will be updated.
The dispatch as its name suggests is used to deliver your actions to different reducers of the Redux store. The reducers will process the action and update the data.
4.4 Reducers
The actions are sent to the store and the store changes the state as mentioned in the action. But they require the Reducers to do this. Initially, Reducers take the existing state of the application and then return the action meant to be executed on the state.
Reducers are simple functions that receive the current state and action and then produce the next state. It is important to note that reducers are used to generate a copy of the changes required in the state, rather than altering it.
The reducer takes the current state as an argument. A simple reducer will look like below:
const initialState = { count: 0 }; function cartItemCounterReducer(state = initialState, action) { switch(action.type) { case 'INCREASE_ITEM': return { ...state, itemCount: state.count + 1 }; case 'DECREASE_ITEM': return { ...state, itemCount: state.count - 1 }; default: return state; } } |
The code above is for the cartItemCounterReducer which handles the state of the count variable. State and action are the two arguments it takes in. The current state of the app is defined in the state argument whereas the action dispatched to modify the state is defined in the action argument. Reducer checks the type of action using a switch statement and then updates the state accordingly.
5. Code Example
Here’s a code example of a Cart, it initializes a store and defines actions to add and remove products from the cart. These actions include specifying the type and payload data. Following the actions, there is a part of the Reducer that handles the “actions” and “payload”.
import { createStore } from 'redux'; // Craete variables for actions const STORE_ITEM_TO_CART = 'STORE_ITEM_TO_CART'; const DELETE_ITEM_FROM_CART = 'DELETE_ITEM_FROM_CART'; // Create Actions creators export const storeItemToCart = (selectedItem) => ({ type: STORE_ITEM_TO_CART, payload: selectedItem }); export const deleteItemFromCart = (selectedItemId) => ({ type: DELETE_ITEM_FROM_CART, payload: selectedItemId }); // Reducer const initialState = { items: [] }; const shoppingCartReducer = (state = initialState, action) => { switch (action.type) { case STORE_ITEM_TO_CART: return { ...state, items: [...state.items, { ...action.payload, id: Date.now() }] }; case DELETE_ITEM_FROM_CART: return { ...state, items: state.items.filter((item) => item.id !== action.payload) }; default: return state; } }; // Define Store in store.js export const store = createStore(shoppingCartReducer); // How to use reducer and store in main shopping cart JS file import React from 'react'; import { useSelector, useDispatch } from 'react-redux'; import { storeItemToCart, deleteItemFromCart } from './store'; export const ShoppingCart = () => { const items = useSelector((state) => state.items); const dispatch = useDispatch(); const storeItemButtonClick = () => { dispatch(storeItemToCart({ name: 'New Item', price: 26.56 })); }; return ( <div> <button onClick={storeItemButtonClick}>Store Item</button> <ul> {items.map((item) => ( <li key={item.id}> {item.name} - ${item.price} <button onClick={() => dispatch(deleteItemFromCart(item.id))}>Delete</button> </li> ))} </ul> <p>All Items total price: ${items.reduce((sum, item) => sum + item.price, 0)}</p> </div> ); }; |
6. Redux Toolkit
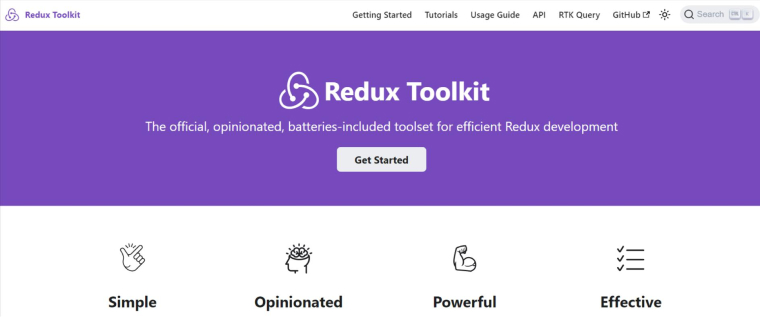
There is no doubt that React is a very robust tool but developers have to write too much boilerplate code if they want to create a reducer, define an action, or set up a store. So, to make things easy for developers, the Redux team created Redux Toolkit(RTK).
It is a set of utilities designed to help you create and manage actions, reducers, and the state of your apps. RTK comes with an opinionated approach and a comprehensive package that simplifies the Redux workflow, reducing the need for developers to write much boilerplate code.
RTK supports middleware such as Redux Thunk Middleware which enables the developers to write asynchronous actions. Configuring the Redux store has also been streamlined with the configureStore function provided by RTK.
7. Advantages of Redux Toolkit
Using RTK over Redux can provide you with the following benefits:
7.1 Reduced Boilerplate
You have to write fewer code lines when using the createSlice function from Redux Toolkit as it generates the action creators and action types automatically. This function combines actions and reducers intoa single “slice” file, effectively reducing the boilerplate code.
7.2 Immutability Handling
Writing immutable updates to the state is easy with the Immer library. You no longer have to copy the states in every reducer when using the Immer library from Redux Toolkit. It also allows direct state mutation.
7.3 DevTools Integration
RTK supports the Redux DevTools Extension. You have to configure the features because Redux Toolkit already includes them by default. Using the predefined functions would help you save a lot of your time and enhance your debugging experience.
8. Redux Toolkit Features
Some of the unique features that distinguish RTK from React Redux library are:
8.1 configureStore
The Redux DevTools extension is automatically set up when using configureStore to create a Redux store. Various configurations including enabling the Redux DevTools extension, applying middleware like redux-thunk, and setting up the Redux store are all combined in this single function call.
It eliminates the manual configurations and simplifies the process of setting up the store.
8.2 createAction
This function performs well by accepting the action types’ lookup table and the value of the initial state. It then creates an action to manage all action types.
8.3 createReducer
Similar to the above function, this one will also accept the initial state’s value and the action types’ lookup table. The only difference is that it will create a reducer for managing the action types. This function is responsible for offering support to the Immer library which helps write immutable code mutably.
8.4 createslice
This function replaces both create action and create reducers functions. Developers can use this function to define the Redux slices that contain relevant selectors, actions, and reducers. Based on the defined slice, this function also generates relevant action creators and reducer functions. This approach helps reduce the boilerplate code.
8.5 createAsyncThunk
Standardized lifecycle states are utilized to create thunk actions, which are one of the asynchronous operations of the system. The createAsyncThunk function simplifies the management of such operations. It can easily manage the logic with quite good predictability by integrating with the built-in loading, success, and error state management from the Redux Toolkit. This function returns a promise after taking the Redux strings as arguments.
8.6 createEntityAdapter
Handling Redux store’s normalized data structure can be standardized using the createEntityAdapter function. It provides certain built-in methods to manipulate entities. Moreover, it helps perform and simplify the Create, Read, Update, Delete (CRUD) operations.
9. How Does the Redux Toolkit Work?
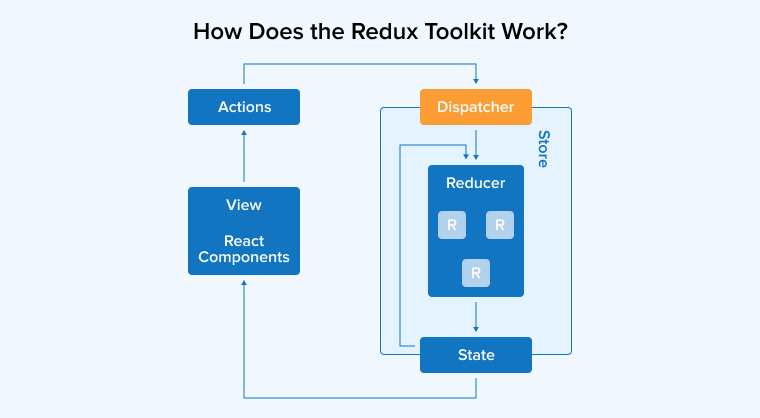
Redux is a very useful state management tool for React, but it entails a significant amount of boilerplate code and API verbosity. Therefore it was decided to develop and deploy Redux Toolkit to solve these challenges that come with using Redux with React.
9.1 Set Up a Store Using RTK
Although it’s difficult to set up a store with pure Redux, you can do it easily with a single call using Redux Toolkit. Setting up a store with a counterReducer slice in it can be done using the following code:
import cartReducer from './cartReducer' const store = configureStore({ reducer: { counter: cartReducer, }, }) export default store |
9.2 Creating an Action Using the Redux Toolkit
RTK is also useful in creating actions. Its createAction feature is used to create an action. You have to invoke this function with an object and then dispatch it with a payload for the corresponding action. For example:
const addToCart = createAction('ADD_TO_CART) addTodo({ productId:51252, itemCount: 1}) // {type : "ADD_TO_CART", payload : { productId:51252, itemCount: 1 }}) |
9.3 Creating the Reducer with Redux Toolkit
In Redux, the pure function would use the switch case syntax to handle the different values of the state. But for that, you have to keep the state immutable.
RTK’s createReducer function uses immer which helps mutate the state and convert it into an immutable version. A reducer defined with the RTK would look accordingly:
import { createAction, createReducer } from '@reduxjs/toolkit' const increment = createAction('counter/increment') const incrementByCount = createAction('counter/incrementByAmount') const initialState = { itemCount: 0 } const counterReducer = createReducer(initialState, (builder) => { builder .addCase(increment, (state, action) => { state.itemCount++ }) .addCase(incrementByCount, (state, action) => { state.itemCount += action.payload }) }) |
With RTK, it’s easy to handle the state. You will realize this difference between Redux and RTK especially when dealing with a complex state with various nested objects. However, the Redux toolkit simplifies the same Redux code easily.
// a case without toolkit, notice the .map to create a new state case 'TOGGLE_ITEM_AVAILABILITY': { const { index } = action.payload return state.map((item, i) => { if (i !== index) return item return { ...item, isAvailable: !item.isAvailable, } }) } // a case with toolkit, notice the mutation which is taken care internally .addCase('TOGGLE_ITEM_AVAILABILITY', (state, action) => { const item = state[action.payload.index] // "mutate" the object by overwriting a field item.isAvailable = !todo.isAvailable }) |
10. Code Example
The below code represents an example of how quickly and efficiently we can write operations to manage the state of cart services.
// Create slice for shopping cart import { createSlice } from '@reduxjs/toolkit'; const shoppingCartSlice = createSlice({ name: 'shoppingCart', initialState: { items: [] }, reducers: { storeItemToCart: (state, action) => { state.items.push({ ...action.payload, id: Date.now() }); }, deleteItemFromCart: (state, action) => { state.items = state.items.filter((item) => item.id !== action.payload); } } }); export const { storeItemToCart, deleteItemFromCart } = shoppingCartSlice.actions; export default shoppingCartSlice.reducer; // Define Store in store.js import { configureStore } from '@reduxjs/toolkit'; import shoppingCartSlice from './shoppingCartSlice'; export const store = configureStore({ reducer: shoppingCartSlice }); // How to use reducer and store in main shopping cart JS file import React from 'react'; import { useSelector, useDispatch } from 'react-redux'; import { storeItemToCart, deleteItemFromCart } from './shoppingCartSlice'; export const ShoppingCart = () => { const items = useSelector((state) => state.items); const dispatch = useDispatch(); const storeItemButtonClick = () => { dispatch(storeItemToCart({ name: 'New Item', price: 26.56 })); }; return ( <div> <button onClick={storeItemButtonClick}>Store Item</button> <ul> {items.map((item) => ( <li key={item.id}> {item.name} - ${item.price} <button onClick={() => dispatch(deleteItemFromCart(item.id))}>Delete</button> </li> ))} </ul> <p>All Items total price: ${items.reduce((sum, item) => sum + item.price, 0)}</p> </div> ); }; |
11. Comparison between Redux vs Redux Toolkit
Although both Redux and RTK are popular and used for state management in JS-based apps, there are some notable differences as mentioned below:
- Configuration of DevTools is necessary in Redux but not in RTK.
- Redux requires a lot of boilerplate code but implementing RTK reduces this as it only needs a single call function.
- It is difficult to learn Redux because of its complexity, but the opinionated approach of Redux Toolkit makes it easy to get started.
- Redux is very popular and has the support of a huge and active community. On the other hand, the Redux Toolkit is relatively new and lacks the same level of support and resources that Redux has.
- It becomes necessary to use redux-thunk for asynchronous performance in react Redux whereas the RTK has built-in redux-thunk.
12. Conclusion
After reviewing this article on Redux vs Redux Toolkit, you might have understood that both libraries are popular and preferred for React development projects. We also saw how each library works along with the features, advantages, and differences between the libraries.
React Redux is indeed a dependable solution for state management. Although some complex attributes are attached to it, they can be simplified with the effective use of the Redux Toolkit. So, it was never about choosing one library over another but picking options that meet your project requirements.
FAQs
Do we need React Redux with Redux Toolkit?
Yes, you have to install two dependencies namely react-redux and @reduxjs/toolkit to use the Redux Toolkit in your react app. It would help if you had react-redux to connect the react components with your Redux store. Meanwhile, @reduxjs/toolkit offers essential tools that help simplify Redux development.
npm install @reduxjs/toolkit react-redux |
What are the cons of Redux with React?
Redux is a very popular state management library, but it also has certain limitations such as:
- Learning and using Redux with React can be complex because it requires writing too much code for its effective implementation.
- You have to write a large amount of boilerplate code to set up the actions, reducers, and stores for your React application. It can be very time-consuming and overwhelming.
- There is a performance overhead when using Redux especially if your app has to deal with large data sets. Every time a state is updated, you have to copy it in Redux. This slows down the performance.
- The efforts required to implement Redux are not justified if you have to build a simple application. With all the complexities associated with using Redux, it’s better to leave it for managing the state of the apps with complex data flows.
Why is Redux popular in React?
Redux became so popular as a front-end technology as soon as it was launched. It is a one-stop solution for all your requirements related to state management. Redux in React also enables you to keep the changes in your app more traceable and predictable. This is to help you understand what’s happening in your react application.
Why use the Redux Toolkit?
There are many reasons to use the Redux Toolkit as it helps you simplify the Redux code, speeds up the development process, writes a good Redux app, and more. You can avail all of these advantages from the Redux Toolkit regardless of your level of skill and experience. The best thing about using the Redux Toolkit is that you can add it at the beginning of the project or integrate it into an existing project.


Comments
Leave a message...