
Angular is an open-source framework managed by Google (Google’s Angular team). It is a complete framework that includes all the necessary technologies and best practices. As with React and Vue, Angular supports the usage of modules, dividing your UI into distinct and reusable components. If you are looking for a reliable partner for your Angular projects, consider collaborating with an experienced Angular Development Company.
To get us started, here are some notable and helpful Angular component libraries to explore when building your upcoming Angular applications.
1. What is a Component Library?
A component library is a compilation of pre-constructed web components or pre-programmed system components. Developers can easily integrate these components into their mobile or web applications, reducing the necessity to write code from scratch.
When implemented successfully, it enables developers to operate consistently and becomes extremely time-productive. Numerous UI component libraries also have customizability options, empowering programmers to innovate, customize, or create new components.
Additionally, component libraries will aid in group communication. When working on a large product with a large number of team workers, a component library will allow to manage several editions and maintain consistency all across the program.
2. Best Angular Component Libraries:
Here we have listed some of the most useful component libraries used in Angular development.
2.1 Angular Material

Angular Material components (previously referred as Material2), is the official Angular component library that adheres to Google’s Material Design guidelines. It is built on the Typescript and Angular frameworks. The library includes a variety of features and enables developers to include them into web apps. This solution includes tools that enable any programmer to create custom components that make use of well-known styles of interaction.
Angular Material is among the most popular libraries for Angular components. Through the command line templates, users can easily integrate new features as well as create tailor-made components using common interaction patterns. It contributes to the uniformity and fluidity of the user experience across several displays and operating systems, including MacOS, Windows, Android, Apple, and Chrome OS. It is a well-organized and well-presented library that is frequently used by programmers worldwide.
Features of Angular Material:
- Responsive design
- A comprehensive suite of UI components
- Conventional CSS
- Dynamic theming capabilities
Angular Material UI Components:
- Autocomplete
- Checkbox
- Datepicker
- Snackbar
- Stepper
- Paginator
Installation:
You can use Yarn or NPM to install Angular Material. The commands for them are as given below:
// with npm npm i @angular/material // with yarn yarn add @angular/material |
Usage of Angular Material:
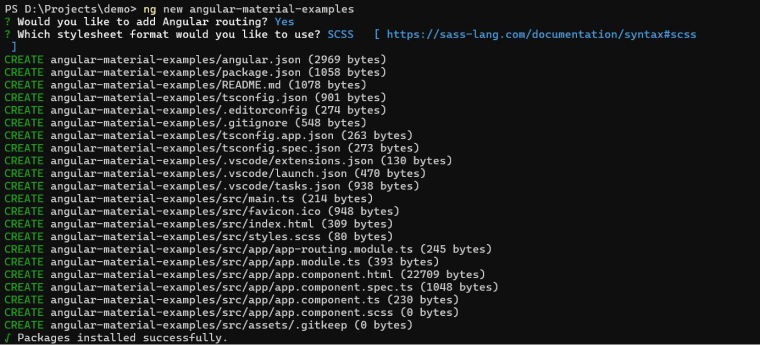
1. Create new project “angular-material-examples” using below command
ng new angular-material-examples cd .\angular-material-examples\ |
2. Install Angular Material
ng add @angular/material |

3. Create a new interface
ng generate interface interfaces/user-data |
user-data.ts
export interface UserData { id: number; firstName: string; lastName: string; email: string; } |
4. Create a new component
ng generate component material-table |
4.1 material-table.component.html
<mat-toolbar> <span>Material Table</span> </mat-toolbar> <div class="mat-elevation-z8 data-table"> <mat-form-field class="filter-input"> <input matInput (keyup)="applyFilter($event)" placeholder="Filter"> </mat-form-field> <table mat-table [dataSource]="dataSource" matSort> <!-- id Column --> <ng-container matColumnDef="id"> <th mat-header-cell *matHeaderCellDef mat-sort-header> No. </th> <td mat-cell *matCellDef="let element"> {{element.id}} </td> </ng-container> <!-- First Name Column --> <ng-container matColumnDef="firstName"> <th mat-header-cell *matHeaderCellDef mat-sort-header> First Name </th> <td mat-cell *matCellDef="let element"> {{element.firstName}} </td> </ng-container> <!-- Last Name Column --> <ng-container matColumnDef="lastName"> <th mat-header-cell *matHeaderCellDef mat-sort-header> Last Name </th> <td mat-cell *matCellDef="let element"> {{element.lastName}} </td> </ng-container> <!-- Email Column --> <ng-container matColumnDef="email"> <th mat-header-cell *matHeaderCellDef mat-sort-header> Email </th> <td mat-cell *matCellDef="let element"> {{element.email}} </td> </ng-container> <tr mat-header-row *matHeaderRowDef="displayedColumns"></tr> <tr mat-row *matRowDef="let row; columns: displayedColumns;"></tr> </table> <mat-paginator [pageSizeOptions]="[5, 10, 20]" showFirstLastButtons aria-label="Select page of User Data"> </mat-paginator> </div> |
4.2 material-table.component.scss
.data-table { width: 90%; margin: 5% auto; } .filter-input{ width: 100%; } |
4.3 material-table.component.ts
import { AfterViewInit, Component, ViewChild } from '@angular/core'; import { MatPaginator, MatPaginatorModule } from '@angular/material/paginator'; import { MatTableDataSource, MatTableModule } from '@angular/material/table'; import { UserData } from '../interfaces/user-data'; import { MatSort, MatSortModule } from '@angular/material/sort'; import { CommonModule } from '@angular/common'; import { MatToolbarModule } from '@angular/material/toolbar'; import { MatInputModule } from '@angular/material/input'; @Component({ selector: 'app-material-table', standalone: true, imports: [CommonModule, MatTableModule, MatPaginatorModule, MatToolbarModule, MatSortModule, MatInputModule], templateUrl: './material-table.component.html', styleUrls: ['./material-table.component.scss'] }) export class MaterialTableComponent implements AfterViewInit { @ViewChild(MatPaginator) paginator!: MatPaginator; @ViewChild(MatSort) sort!: MatSort; userData: UserData[] = [ { id: 1, firstName: "James", lastName: "Butt", email: "[email protected]" }, { id: 2, firstName: "Josephine", lastName: "Darakjy", email: "[email protected]" }, { id: 3, firstName: "Art", lastName: "Venere", email: "[email protected]" }, { id: 4, firstName: "Lenna", lastName: "Paprocki", email: "[email protected]" }, { id: 5, firstName: "Donette", lastName: "Foller", email: "[email protected]" }, { id: 5, firstName: "Simona", lastName: "Morasca", email: "[email protected]" }, { id: 7, firstName: "Mitsue", lastName: "Tollner", email: "[email protected]" }, { id: 8, firstName: "Leota", lastName: "Dilliard", email: "[email protected]" }, { id: 9, firstName: "Sage", lastName: "Wieser", email: "[email protected]" }, { id: 10, firstName: "Kris", lastName: "Marrier", email: "[email protected]" }, { id: 11, firstName: "Minna", lastName: "Amigon", email: "[email protected]" }, { id: 12, firstName: "Abel", lastName: "Maclead", email: "[email protected]" }, { id: 13, firstName: "Kiley", lastName: "Caldarera", email: "[email protected]" }, { id: 14, firstName: "Graciela", lastName: "Ruta", email: "[email protected]" }, { id: 15, firstName: "Cammy", lastName: "Albares", email: "[email protected]" }, { id: 16, firstName: "Mattie", lastName: "Poquette", email: "[email protected]" }, { id: 17, firstName: "Meaghan", lastName: "Garufi", email: "[email protected]" }, { id: 18, firstName: "Gladys", lastName: "Rim", email: "[email protected]" }, { id: 19, firstName: "Yuki", lastName: "Whobrey", email: "[email protected]" }, { id: 20, firstName: "Fletcher", lastName: "Flosi", email: "[email protected]" } ]; displayedColumns: string[] = ['id', 'firstName', 'lastName', 'email']; dataSource = new MatTableDataSource<UserData>(this.userData); ngAfterViewInit() { this.dataSource.paginator = this.paginator; this.dataSource.sort = this.sort; } applyFilter(event: Event) { let value = (event.target as HTMLInputElement).value; this.dataSource.filter = value.trim().toLowerCase(); } } |
5. Route configuration within the ‘app-routing.module.ts’ file.
import { NgModule } from '@angular/core'; import { RouterModule, Routes } from '@angular/router'; import { MaterialTableComponent } from './material-table/material-table.component'; const routes: Routes = [ { path: '', pathMatch: 'full', redirectTo: 'material-table' }, { path: 'material-table', component: MaterialTableComponent } ]; @NgModule({ imports: [RouterModule.forRoot(routes)], exports: [RouterModule] }) export class AppRoutingModule { } |
Folder Structure
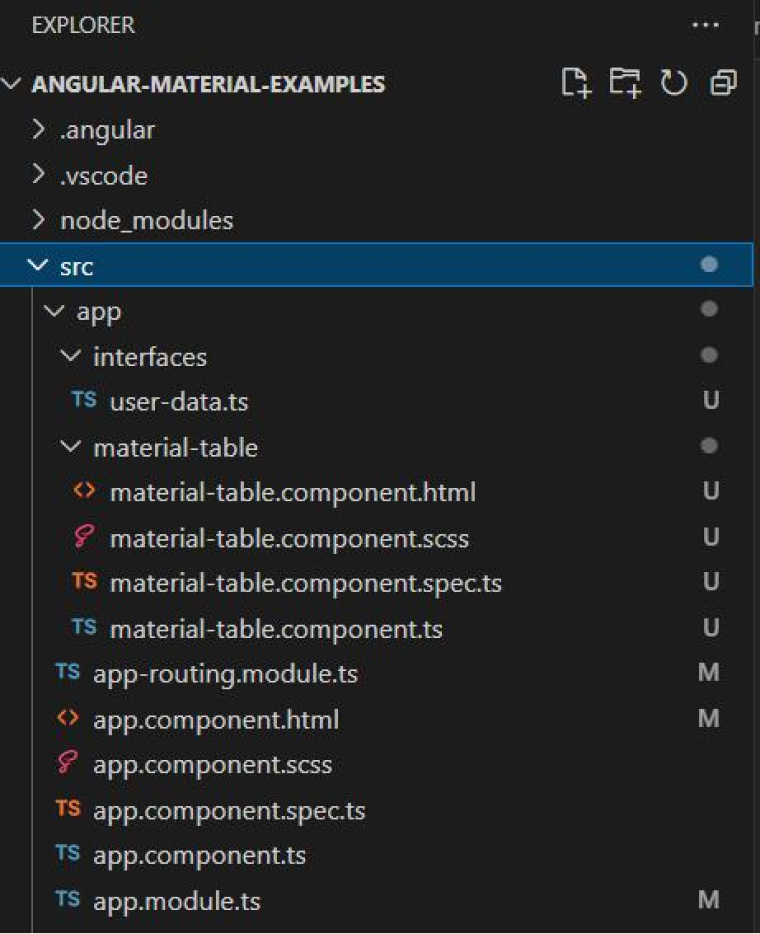
UI images


2.2 NG-BootStrap
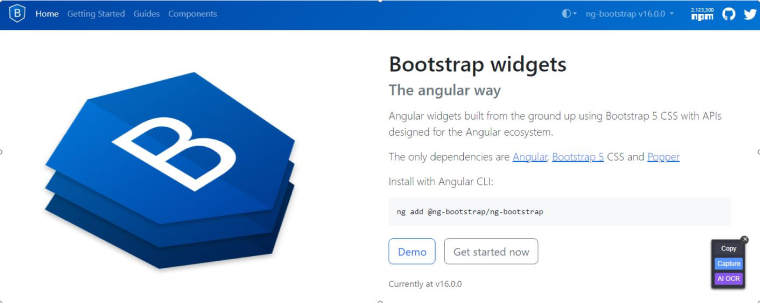
In 2015, there was an introduction to NG-bootstrap as a new UI, which later became one of the best Angular UI libraries. NG Bootstrap delivers Angular widgets with advanced input components developed from scratch using Bootstrap 4 CSS. These widgets are simple to use and require no further knowledge other than Angular and Bootstrap. Their component package is also easy to manage and has no third-party js dependencies. This Angular library has garnered support from a large development community.
There is a similar UI called NGX- bootstrap. What makes them different from each other is the type of versioning and support of native angular components.
NG Bootstrap Features:
- Lightweight footprint
- A suite of directives designed specifically for Bootstrap’s components
- Advanced components
- Bootstrap UI elements
NG Bootstrap Components:
- Dropdown
- Modals
- Navigation menus
- Badges
- Carousel
- Forms
- Alerts
Installation:
You can execute the following commands in Yarn or NPM for installing NG Bootstrap;
// with npm npm i @ng-bootstrap/ng-bootstrap // with yarn yarn add @ng-bootstrap/ng-bootstrap |
Usage of NG Bootstrap:
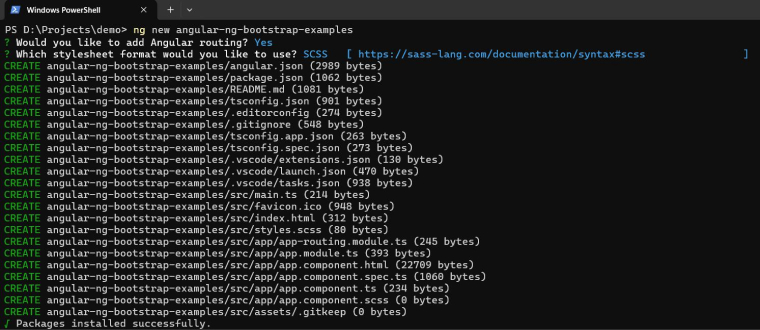
1. Create new project “angular-ng-bootstrap-examples” using below command
ng new angular-ng-bootstrap-examples cd .\angular-ng-bootstrap-examples\ |
2. Install ng-bootstrap
ng add @ng-bootstrap/ng-bootstrap |

3. Create a new interface
ng generate interface interfaces/user-data |
user-data.ts
export interface UserData { id?: number; firstName: string; lastName: string; email: string; } |
4. Create a new component
ng generate component ng-table |
4.1 ng-table.component.html
<ul ngbNav #nav="ngbNav" class="nav-tabs"> <li ngbNavItem> <button ngbNavLink>NG Table</button> <ng-template ngbNavContent> <table class="table table-striped data-table"> <thead> <tr> <th scope="col">#</th> <th scope="col" sortable="firstName">First Name</th> <th scope="col" sortable="lastName">Last Name</th> <th scope="col" sortable="email">Email</th> </tr> </thead> <tbody> <tr *ngFor="let data of dataList"> <th scope="row">{{ data.id }}</th> <td>{{data.firstName}}</td> <td>{{data.lastName}}</td> <td>{{data.email}}</td> </tr> </tbody> </table> <div class="d-flex justify-content-between p-2"> <ngb-pagination [collectionSize]="total" [(page)]="page" [pageSize]="pageSize" (pageChange)="filterData()"> </ngb-pagination> <select class="form-select" style="width: auto" [(ngModel)]="pageSize" (ngModelChange)="filterData()"> <option [ngValue]="5">5 items per page</option> <option [ngValue]="10">10 items per page</option> <option [ngValue]="20">20 items per page</option> </select> </div> </ng-template> </li> </ul> <div [ngbNavOutlet]="nav"></div> |
4.2 ng-table.component.scss
.data-table { margin-top: 3em; } |
4.3 ng-table.component.ts
import { NgFor} from '@angular/common'; import { Component } from '@angular/core'; import { FormsModule } from '@angular/forms'; import { NgbTypeaheadModule, NgbPaginationModule, NgbNavModule } from '@ng-bootstrap/ng-bootstrap'; import { UserData } from '../interfaces/user-data'; @Component({ selector: 'app-ng-table', standalone: true, imports: [NgFor,NgbNavModule,FormsModule, NgbTypeaheadModule, NgbPaginationModule], templateUrl: './ng-table.component.html', styleUrls: ['./ng-table.component.scss'] }) export class NgTableComponent { userData: UserData[] = [ { firstName: "Minna", lastName: "Amigon", email: "[email protected]" }, { firstName: "Abel", lastName: "Maclead", email: "[email protected]" }, { firstName: "Kiley", lastName: "Caldarera", email: "[email protected]" }, { firstName: "Graciela", lastName: "Ruta", email: "[email protected]" }, { firstName: "Cammy", lastName: "Albares", email: "[email protected]" }, { firstName: "Mattie", lastName: "Poquette", email: "[email protected]" }, { firstName: "Meaghan", lastName: "Garufi", email: "[email protected]" }, { firstName: "Gladys", lastName: "Rim", email: "[email protected]" }, { firstName: "Yuki", lastName: "Whobrey", email: "[email protected]" }, { firstName: "Fletcher", lastName: "Flosi", email: "[email protected]" }, { firstName: "Minna", lastName: "Amigon", email: "[email protected]" }, { firstName: "Abel", lastName: "Maclead", email: "[email protected]" }, ]; page = 1; pageSize = 5; total = this.userData.length; dataList: UserData[] = [] constructor() { this.filterData(); } filterData() { this.dataList = this.userData.map((data, i) => ({ id: i + 1, ...data })).slice( (this.page - 1) * this.pageSize, (this.page - 1) * this.pageSize + this.pageSize, ); } } |
5. Route configuration within the ‘app-routing.module.ts’ file.
import { NgModule } from '@angular/core'; import { RouterModule, Routes } from '@angular/router'; import { NgTableComponent } from './ng-table/ng-table.component'; const routes: Routes = [ { path: '', pathMatch: 'full', redirectTo: 'ng-table' }, { path: 'ng-table', component: NgTableComponent } ]; @NgModule({ imports: [RouterModule.forRoot(routes)], exports: [RouterModule] }) export class AppRoutingModule { } |
Folder Structure
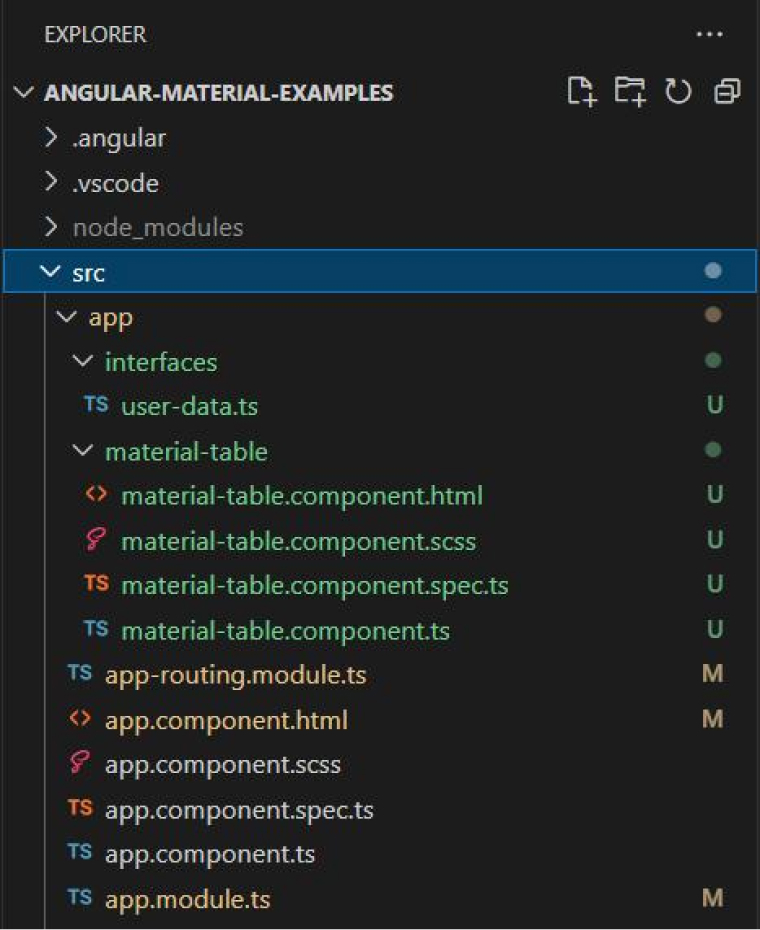
UI images


2.3 NGX- Bootstrap
Valor is the company that has introduced NGX bootstrap software, which is another popular Angular UI component library. It includes all of the essential Bootstrap components where Angular plays a major role. So you no longer need to add original JS components; instead, you can rely on markup and CSS in Bootstrap. It is the best and most straightforward method to quickly integrate Bootstrap 3 and 4 components with Angular.
Because all of the Bootstrap components are developed using Angular, they deliver responsive web design or responsive UI and improve performance across all platforms. It is one of the quickest approaches to incorporate Bootstrap 3 or Bootstrap 4. The major distinct factors between NG and NGX bootstrap are built-in animation support and better support like nested modals, modal as a service, and a sortable component with other types of drag-and-drop features. Also, the community of Angular developers has given 5.5K stars on GitHub.
NGX Bootstrap Features:
- Numerous bootstrap components
- Carousel component
- Tooltips
- Popovers
- Accordion component
NGX Bootstrap Components:
- Accordion
- Pagination
- Popover
- Buttons
- Tooltip
Installation:
For the installation of NGX Bootstrap, implement the code given below in NPM or Yarn.
// with npm npm i ngx-bootstrap // with yarn yarn add ngx-bootstrap |
Usage of NGX Bootstrap:
1. Create new project “angular-ngx-bootstrap-examples” using below command
ng new angular-ngx-bootstrap-examples cd .\angular-ngx-bootstrap-examples\ |
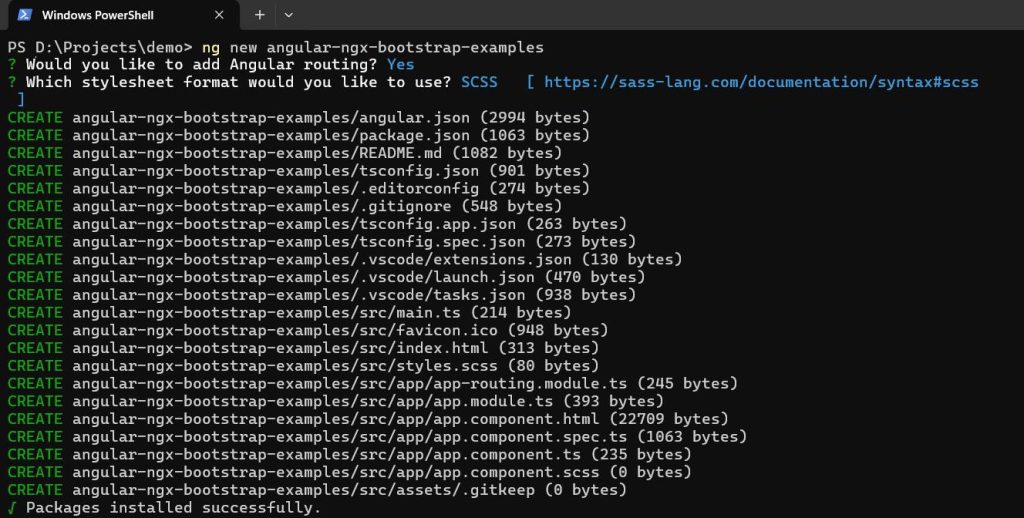
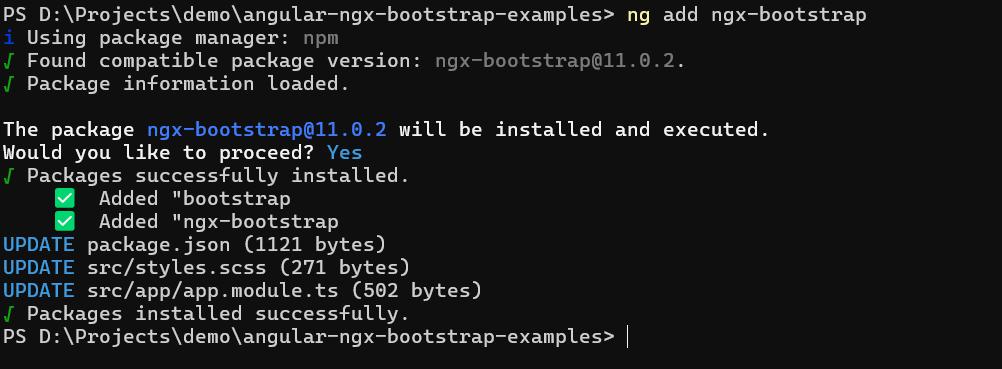
2. Install ngx-bootstrap
ng add ngx-bootstrap |
3. Create a new interface
ng generate interface interfaces/user-data |
user-data.ts
export interface UserData { id: number; firstName: string; lastName: string; status: boolean; email: string; } |
4. Create a new pipe
ng generate pipe pipes/paginate-pipe |
import { Pipe, PipeTransform } from '@angular/core'; @Pipe({ name: 'paginatePipe', standalone: true }) export class PaginatePipePipe implements PipeTransform { transform(value: any[], currentPage: number, perpage: number): any { let result = value.filter((curr, index) => { return index >= (currentPage - 1) * perpage && index < currentPage * perpage }); return result; } } |
5. Create a new component
ng generate component ngx-table |
5.1 ngx-table.component.html
<tabset> <tab heading="NGX Table" id="tab1"> <div class="alt-d" *ngIf="isAlertActive"> <alert [type]="'success'" dismissOnTimeout="3000" (onClosed)="isAlertActive = false">You have successfully changed status.</alert> </div> <table class="table table-striped data-table"> <thead> <tr> <th scope="col">#</th> <th scope="col" sortable="firstName">First Name</th> <th scope="col" sortable="lastName">Last Name</th> <th scope="col" sortable="email">Email</th> <th scope="col">Action</th> </tr> </thead> <tbody> <tr *ngFor="let data of (userData | paginatePipe:currentPage:itemsPerPage);"> <th scope="row">{{ data.id }}</th> <td>{{data.firstName}}</td> <td>{{data.lastName}}</td> <td>{{data.email}}</td> <td> <button type="button" class="btn " [ngClass]="data.status ? 'btn-primary' : 'btn-danger'" [popover]="'Click to change user status'" triggers="mouseenter:mouseleave" (click)="openModal(template, data.id)"> {{data.status? 'Active': 'Inactive'}} </button> </td> </tr> </tbody> </table> <pagination [totalItems]="totalItems" [itemsPerPage]="itemsPerPage" [maxSize]="maxSize" [(ngModel)]="currentPage" (pageChanged)="pageChanged($event)"></pagination> </tab> </tabset> <ng-template #template> <div class="modal-body text-center"> <p>Do you want to change status?</p> <button type="button" class="btn btn-default" (click)="confirm()">Yes</button> <button type="button" class="btn btn-primary" (click)="decline()">No</button> </div> </ng-template> |
5.2 ngx-table.component.scss
.data-table { margin-top: 3em; } .alt-d { margin: 10px 20px 0 20px; } |
5.3 ngx-table.component.ts
import { Component, TemplateRef } from '@angular/core'; import { CommonModule } from '@angular/common'; import { PageChangedEvent, PaginationModule } from 'ngx-bootstrap/pagination'; import { PopoverModule } from 'ngx-bootstrap/popover'; import { TabsModule } from 'ngx-bootstrap/tabs'; import { FormsModule } from '@angular/forms'; import { PaginatePipePipe } from '../pipes/paginate-pipe.pipe'; import { BsModalRef, BsModalService, ModalModule } from 'ngx-bootstrap/modal'; import { AlertModule } from 'ngx-bootstrap/alert'; import { UserData } from '../interfaces/user-data'; @Component({ selector: 'app-ngx-table', standalone: true, imports: [CommonModule, FormsModule, AlertModule, PaginationModule, TabsModule, PaginatePipePipe, PopoverModule, ModalModule], providers: [BsModalService], templateUrl: './ngx-table.component.html', styleUrls: ['./ngx-table.component.scss'] }) export class NgxTableComponent { userData: UserData[] = [ { id: 1, firstName: "Minna", lastName: "Amigon", status: true, email: "[email protected]" }, { id: 2, firstName: "Abel", lastName: "Maclead", status: true, email: "[email protected]" }, { id: 3, firstName: "Kiley", lastName: "Caldarera", status: true, email: "[email protected]" }, { id: 4, firstName: "Graciela", lastName: "Ruta", status: true, email: "[email protected]" }, { id: 5, firstName: "Cammy", lastName: "Albares", status: true, email: "[email protected]" }, { id: 6, firstName: "Mattie", lastName: "Poquette", status: true, email: "[email protected]" }, { id: 7, firstName: "Meaghan", lastName: "Garufi", status: true, email: "[email protected]" }, { id: 8, firstName: "Gladys", lastName: "Rim", status: true, email: "[email protected]" }, { id: 9, firstName: "Yuki", lastName: "Whobrey", status: true, email: "[email protected]" }, { id: 10, firstName: "Fletcher", lastName: "Flosi", status: true, email: "[email protected]" }, { id: 11, firstName: "Minna", lastName: "Amigon", status: true, email: "[email protected]" }, { id: 12, firstName: "Abel", lastName: "Maclead", status: true, email: "[email protected]" }, ]; totalItems: number = this.userData.length; currentPage: number = 1; itemsPerPage: number = 5; page!: number; maxSize: number = 5; modalRef?: BsModalRef; isAlertActive: boolean = false; constructor(private modalService: BsModalService) { } pageChanged(event: PageChangedEvent): void { this.page = event.page; } openModal(template: TemplateRef<void>, id: number) { this.modalRef = this.modalService.show(template, { class: 'modal-sm', id: id }); } confirm(): void { this.isAlertActive = true this.userData[Number(this.modalRef?.id) - 1].status = !this.userData[Number(this.modalRef?.id) - 1].status; this.modalRef?.hide(); } decline(): void { this.modalRef?.hide(); } } |
6. Route configuration within the ‘app-routing.module.ts’ file.
import { NgModule } from '@angular/core'; import { RouterModule, Routes } from '@angular/router'; import { NgxTableComponent } from './ngx-table/ngx-table.component'; const routes: Routes = [ { path: '', pathMatch: 'full', redirectTo: 'ngx-table' }, { path: 'ngx-table', component: NgxTableComponent } ]; @NgModule({ imports: [RouterModule.forRoot(routes)], exports: [RouterModule] }) export class AppRoutingModule { } |
Folder Structure
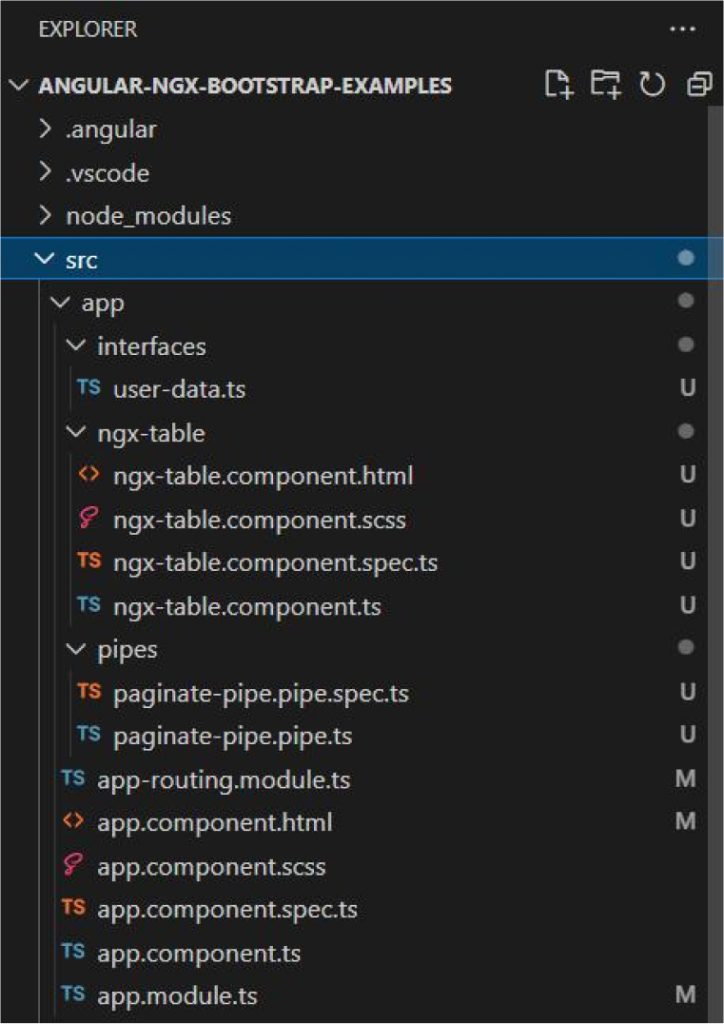
UI images


2.4 Kendo UI

The next name in this list of Angular libraries is Kendo UI. This is a high-quality Angular UI component toolkit that will help you take your Angular project to the next level. Kendo UI is a library that assists Angular development companies to step ahead with advanced app development process. It is one of the most professional Angular component libraries.
Many features of Angular Kendo UI make it different from others in the same league. There are a variety of UI components available for speed, performance, localization, and accessibility. There are more than 80 UI components for theme building, upgrades, and flexibility.
Kendo UI Features:
- Easy integration
- Ability to customize themes
- Adheres to the accessibility standards
- Responsive design
- Supports JavaScript and TypeScript development
Kendo UI Components:
- Scheduler
- Graphs
- Grid
- TreeView
- Charts
Installation:
For the installation of Kendo UI, implement the code given below in NPM or Yarn.
// with npm npm install --save @progress/kendo-ui // with yarn yarn add @progress/kendo-ui |
Usage of Kendo UI:
Kendo UI is an Angular component library mostly suitable for enterprise applications that have complex user interactions and extensive data management.
1. Create new project “angular-kendo-ui-examples” using below command
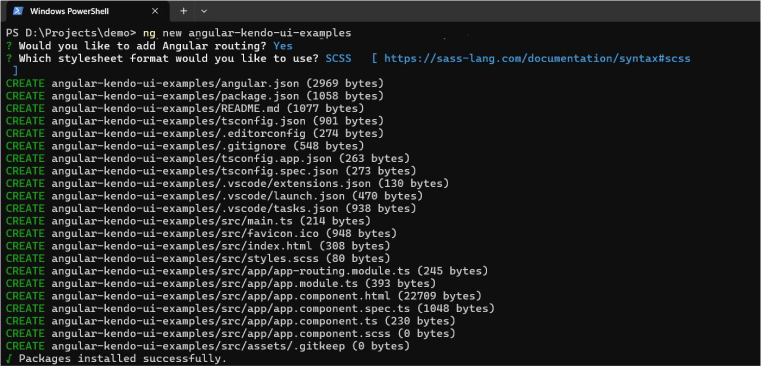
2. Install kendo-ui related library
npm install @progress/kendo-ui npm install @progress/kendo-angular-charts npm install @progress/kendo-angular-grid |

npm install hammerjs |

3. Create a new interface
ng generate interface interfaces/user-data |
user-data.ts
export interface UserData { id: number; firstName: string; lastName: string; status: boolean; email: string; } |
4. Create a new component
4.1 kenda-table.component.html
<kendo-grid [kendoGridBinding]="gridView" kendoGridSelectBy="id" [selectedKeys]="mySelection" [pageSize]="10" [pageable]="true" [sortable]="true" [groupable]="true" [reorderable]="true" [resizable]="true" [height]="500" [columnMenu]="{ filter: false }" (cellClick)="cellClick($event)"> <kendo-grid-column-group title="User Data" [columnMenu]="false"> <kendo-grid-column field="firstName" title="First Name" [width]="220"> </kendo-grid-column> <kendo-grid-column field="lastName" title="Last Name" [width]="220"> </kendo-grid-column> <kendo-grid-column field="email" title="Email" [width]="130"> </kendo-grid-column> <kendo-grid-column field="status" title="Status" [width]="200"> <ng-template kendoGridCellTemplate let-dataItem> <div >{{ dataItem.status ? 'Active': 'Inactive' }}</div> </ng-template> </kendo-grid-column> </kendo-grid-column-group> </kendo-grid> |
4.2 kenda-table.component.ts
import { Component, OnInit } from '@angular/core'; import { UserData } from '../interfaces/user-data'; @Component({ selector: 'app-kenda-table', templateUrl: './kenda-table.component.html', styleUrls: ['./kenda-table.component.scss'] }) export class KendaTableComponent implements OnInit { userData: UserData[] = [ { id: 1, firstName: "Minna", lastName: "Amigon", status: true ,email: "[email protected]" }, { id: 2, firstName: "Abel", lastName: "Maclead", status: true ,email: "[email protected]" }, { id: 3, firstName: "Kiley", lastName: "Caldarera", status: false ,email: "[email protected]" }, { id: 4, firstName: "Graciela", lastName: "Ruta", status: true ,email: "[email protected]" }, { id: 5, firstName: "Cammy", lastName: "Albares", status: true ,email: "[email protected]" }, { id: 6, firstName: "Mattie", lastName: "Poquette", status: true ,email: "[email protected]" }, { id: 7, firstName: "Meaghan", lastName: "Garufi", status: false ,email: "[email protected]" }, { id: 8, firstName: "Gladys", lastName: "Rim", status: true ,email: "[email protected]" }, { id: 9, firstName: "Yuki", lastName: "Whobrey", status: true ,email: "[email protected]" }, { id: 10, firstName: "Fletcher", lastName: "Flosi", status: true ,email: "[email protected]" }, { id: 11, firstName: "Minna", lastName: "Amigon", status: true ,email: "[email protected]" }, { id: 12, firstName: "Abel", lastName: "Maclead", status: true ,email: "[email protected]" }, { id: 13, firstName: "Kiley", lastName: "Caldarera", status: true ,email: "[email protected]" }, { id: 14, firstName: "Graciela", lastName: "Ruta", status: true ,email: "[email protected]" }, { id: 15, firstName: "Cammy", lastName: "Albares", status: true ,email: "[email protected]" }, { id: 16, firstName: "Mattie", lastName: "Poquette", status: true ,email: "[email protected]" }, { id: 17, firstName: "Meaghan", lastName: "Garufi", status: true ,email: "[email protected]" }, { id: 18, firstName: "Gladys", lastName: "Rim", status: true ,email: "[email protected]" }, { id: 19, firstName: "Yuki", lastName: "Whobrey", status: true ,email: "[email protected]" }, { id: 20, firstName: "Fletcher", lastName: "Flosi", status: true ,email: "[email protected]" }, { id: 21, firstName: "Minna", lastName: "Amigon", status: true ,email: "[email protected]" }, { id: 22, firstName: "Abelq", lastName: "Maclead", status: true ,email: "[email protected]" }, ]; gridView!: UserData[]; mySelection: string[] = []; ngOnInit(): void { this.gridView = this.userData; } cellClick(e: any) { console.log(e); } } |
5. Route configuration within the ‘app-routing.module.ts’ file.
import { NgModule } from '@angular/core'; import { RouterModule, Routes } from '@angular/router'; import { KendaTableComponent } from './kenda-table/kenda-table.component'; const routes: Routes = [ { path: '', pathMatch: 'full', redirectTo: 'kenda' }, { path: 'kenda', component: KendaTableComponent } ]; @NgModule({ imports: [RouterModule.forRoot(routes)], exports: [RouterModule] }) export class AppRoutingModule { } |
Folder Structure
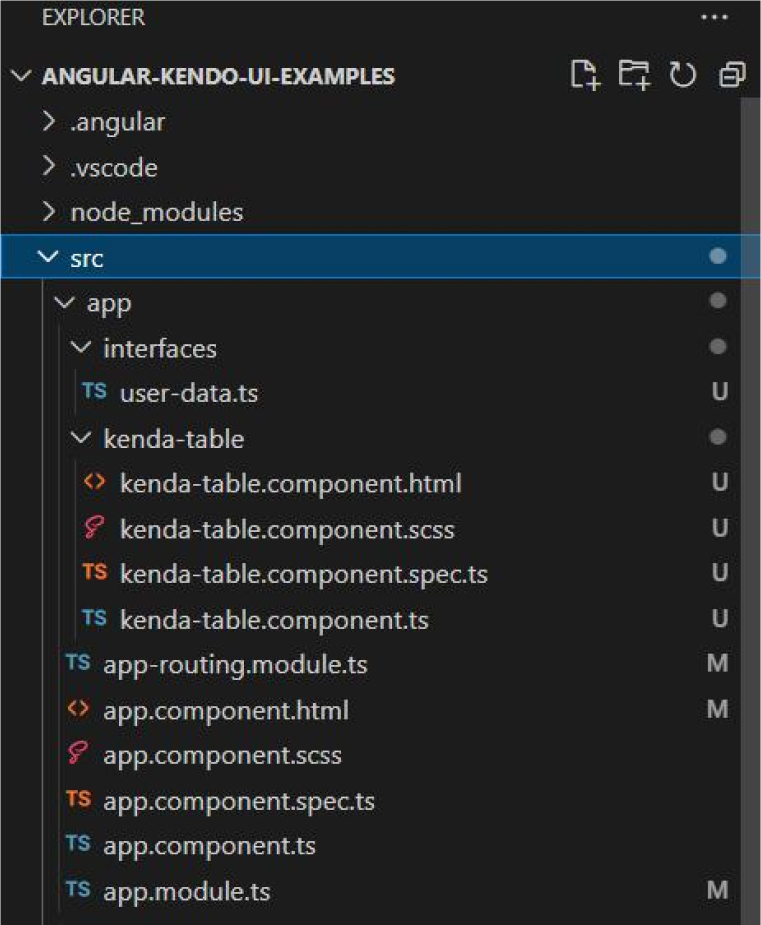
UI images


2.5 Onsen UI
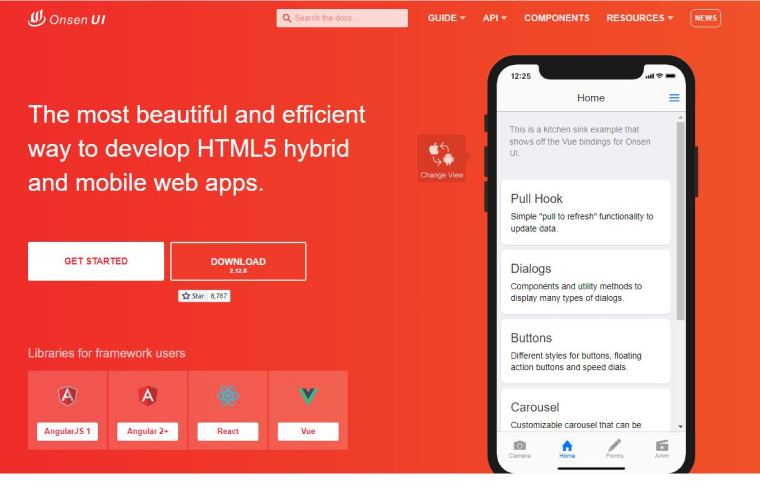
With Angular UI and Onsen UI, it is utilized to develop stunning Android and iOS apps. Onsen UI includes Angular UI directives that automatically adapt styling based on the platform.
Onsen UI is an open-source set of UI components to develop HTML5 hybrid mobile applications. This also includes a wide range of Angular components for building cross-platform web applications and hybrid apps.
Most importantly, it supports both types of software development platforms Android and iOS. Angular developers will find it simple to set up and learn. The stars on GitHub is 8.8K.
Onsen UI Features:
- Cross-platform compatibility
- Customizable themes
- Ready-made components
- Responsive design
Onsen UI Components:
- Ons-navigator
- Ons-splitter
- Ons-carousel
- Ons-tabbar
- Ons-switch
- Ons-dialog
Installation:
Leverage NPM for installing the Onsen UI with the following command
// with npm npm install onsenui ngx-onsenui --save |
Usage of Onsen UI:
1. Create new project “angular-onsen-examples” using below command
ng new angular-onsen-examples cd .\angular-onsen-examples \ |
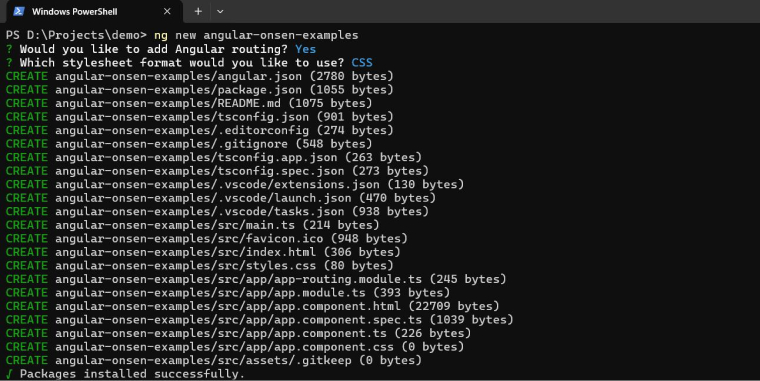
2. Install Onsen
Use npm to install Onsen UI Core (onsenui) and the binding library for Angular (ngx-onsenui).
npm install onsenui ngx-onsenui --save |
Unpkg provides CDN support for Onsen UI’s CSS and JavaScript. Just use these CDN links.
<link rel="stylesheet" href="https://unpkg.com/onsenui/css/onsenui.css"> <link rel="stylesheet" href="https://unpkg.com/onsenui/css/onsen-css-components.min.css"> <script src="https://unpkg.com/onsenui/js/onsenui.min.js"></script> |
3. Create a new interface
ng generate interface interfaces/animal-data |
animal-data.ts
export interface AnimalData { id: number; name: string; description: string; } |
4. Update app component
4.1 app.component.html
<ons-page id="AnimalList"> <ons-toolbar id="Animal-List"> <div class="center">{{title}}</div> </ons-toolbar> <ons-list id="Animal-list"> <ons-list-item *ngFor="let item of animalList" expandable> <div class="nd-b">{{item.id}}. {{item.name}}</div> <div class="expandable-content"> {{item.description}} </div> </ons-list-item> </ons-list> </ons-page> <router-outlet></router-outlet> |
4.2 app.component.scss
.nd-b{ font-weight: bold; } |
4.3 app.component.ts
import { Component } from '@angular/core'; import { AnimalData } from './interfaces/animal-data'; @Component({ selector: 'app-root', templateUrl: './app.component.html', styleUrls: ['./app.component.css'] }) export class AppComponent { title: string = 'Animal List'; animalList: AnimalData[] = [ { id: 1, name: "The Cheetah", description: 'Known for its unparalleled speed, the cheetah serves as an analogy for velocity and agility in nature. Through studying the cheetah`s anatomy and hunting strategies, we gain insights into the biomechanics of rapid movement and pursuit.' }, { id: 2, name: "The Octopus", description: ' With its remarkable intelligence and adaptive abilities, the octopus exemplifies flexibility and problem-solving in the animal kingdom. By examining the octopus`s complex nervous system and camouflage techniques, we explore the concept of adaptability and innovation.' }, { id: 3, name: "The Bee", description: 'As a symbol of community and cooperation, the bee offers lessons in social organization and collective action. Through the study of bee colonies and hive dynamics, we uncover principles of collaboration and division of labor.' }, { id: 4, name: "The Polar Bear", description: 'Thriving in one of the harshest environments on Earth, the polar bear embodies resilience and specialized adaptation. By understanding the bear`s thick fur, insulating blubber, and hunting techniques, we delve into the concept of survival in extreme conditions.' }, { id: 5, name: "The Hummingbird", description: 'With its extraordinary flight capabilities and specialized anatomy, the hummingbird represents efficiency and precision in nature. Through analysis of its rapid wingbeats and unique feeding strategies, we explore the concept of optimization and energy conservation.' } ]; } |
5. Update app.module.ts’ file.
import { CUSTOM_ELEMENTS_SCHEMA, NgModule } from '@angular/core'; import { BrowserModule } from '@angular/platform-browser'; import { AppRoutingModule } from './app-routing.module'; import { AppComponent } from './app.component'; import { OnsenModule } from 'ngx-onsenui'; @NgModule({ declarations: [ AppComponent ], imports: [ BrowserModule, AppRoutingModule, OnsenModule ], providers: [], bootstrap: [AppComponent], schemas: [ CUSTOM_ELEMENTS_SCHEMA ] }) export class AppModule { } |
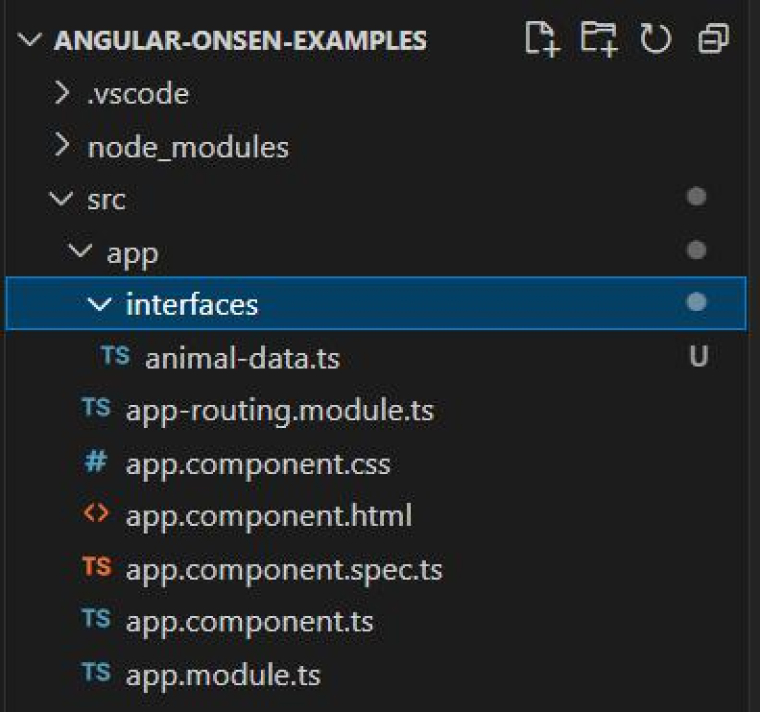
Folder Structure
UI images


2.6 VaadinUI
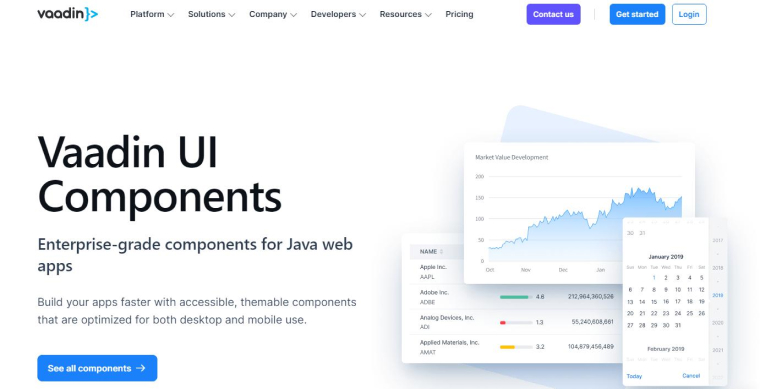
Vaadin is one of the best Angular libraries, offering over 45 open-source components tailored for web and mobile applications. It helps offer an enhanced user experience. Built upon the W3C web components standards, Vaadin is also compatible with various frameworks and browsers.
Vaadin Features:
- Figma library
- Quick and secure server-client communication
- Route management
- Supports screen readers and keyboard navigation
Vaadin Components:
- Charts
- DataGrids
- Filterable dropdown field
- DatePicker
Installation:
Use NPM to install the Vaadin.
// with npm npm i @vaadin/vaadin-grid |
Usage of Vaadin UI:
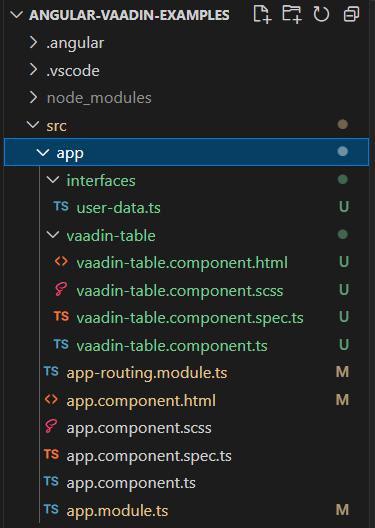
1. Create new project “angular-vaadin-examples” using below command
ng new angular-vaadin-examples cd .\angular-vaadin-examples\ |
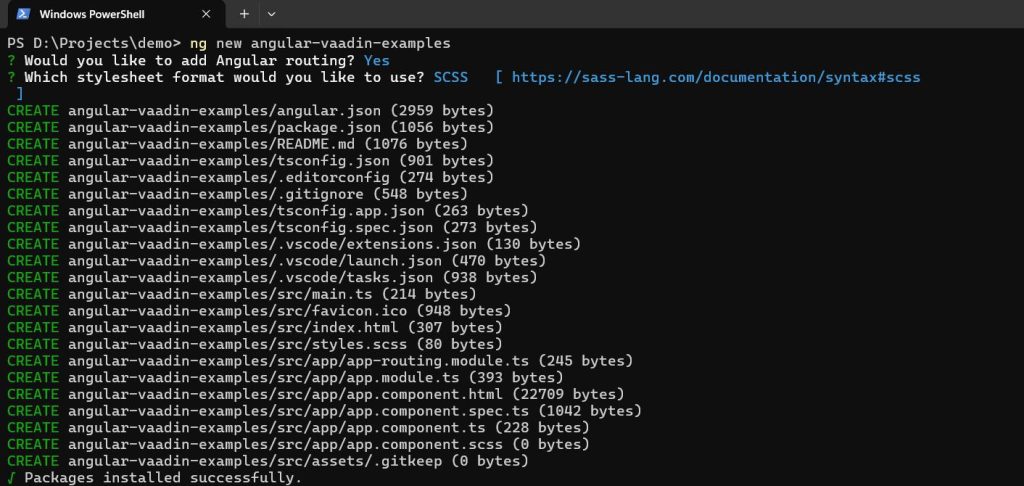
2. Install Vaadin
ng add @vaadin/vaadin |

3. Create a new interface
ng generate interface interfaces/user-data |
user-data.ts
export interface UserData { id: number; firstName: string; lastName: string; email: string; updatedDate: Date; } |
4. Create a new component
ng generate component vaadin-table |
4.1 vaadin-table.component.html
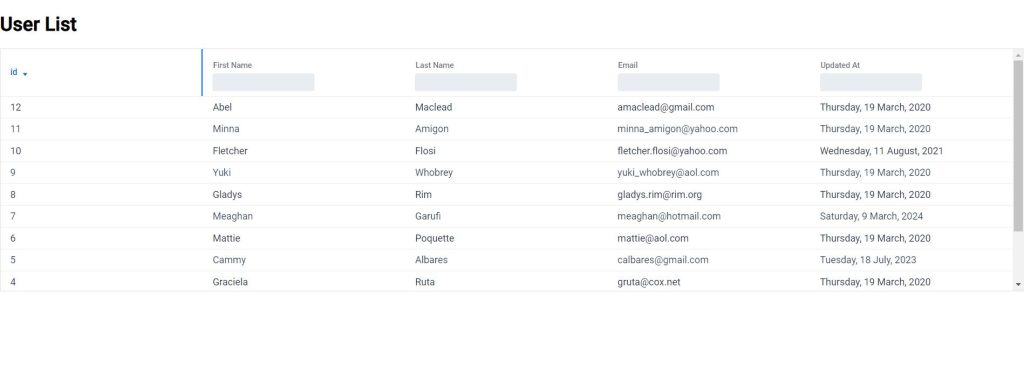
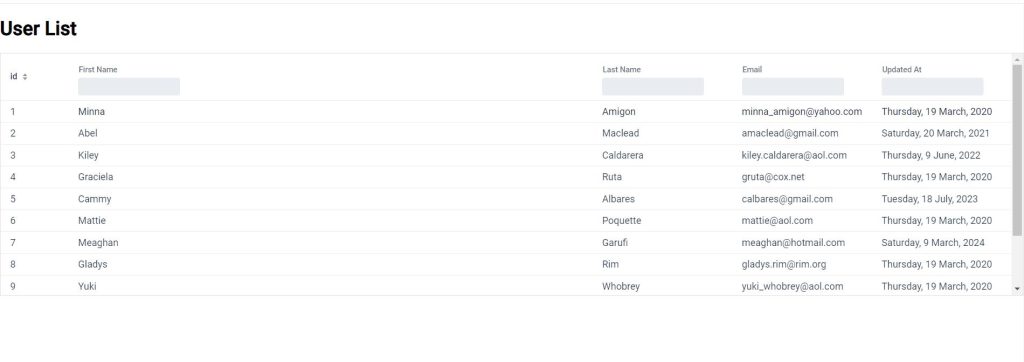
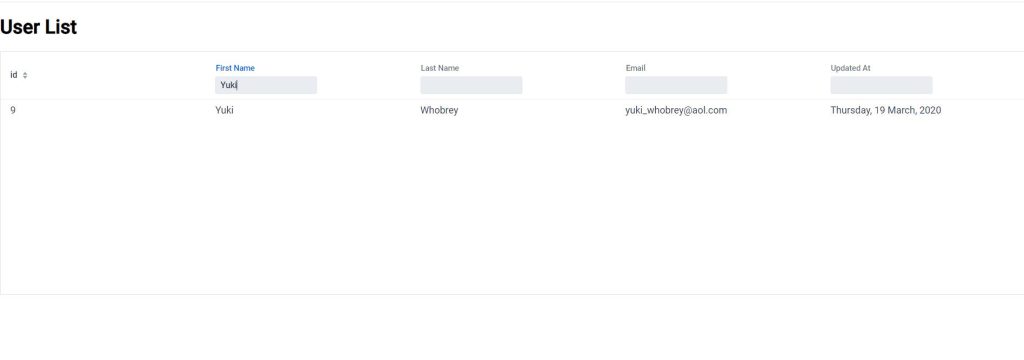
<vaadin-app-layout> <h1 slot="navbar">User List</h1> <vaadin-grid editor-position="bottom" [items]="userData" multi-sort multi-sort-priority="append"> <vaadin-grid-sort-column path="id" header="id" resizable></vaadin-grid-sort-column> <vaadin-grid-filter-column path="firstName"header="First Name" resizable></vaadin-grid-filter-column> <vaadin-grid-filter-column path="lastName" header="Last Name" resizable></vaadin-grid-filter-column> <vaadin-grid-filter-column path="email" header="Email" resizable ></vaadin-grid-filter-column> <vaadin-grid-filter-column path="updatedDate" header="Updated At" [renderer]="updatedDateRenderer" resizable></vaadin-grid-filter-column> </vaadin-grid> </vaadin-app-layout> |
4.2 vaadin-table.component.ts
import { Component } from '@angular/core'; import { customElement } from 'lit/decorators.js'; import { LitElement } from 'lit'; import '@vaadin/grid/vaadin-grid-sort-column'; import '@vaadin/grid/vaadin-grid-filter-column'; import '@vaadin/crud'; import { UserData } from '../interfaces/user-data'; @customElement('grid-item-details') @Component({ selector: 'app-vaadin-table', templateUrl: './vaadin-table.component.html', styleUrls: ['./vaadin-table.component.scss'] }) export class VaadinTableComponent extends LitElement { userData: UserData[] = [ { id: 1, firstName: "Minna", lastName: "Amigon", email: "[email protected]", updatedDate: new Date(Date.UTC(2020, 2, 19, 0, 0, 0)) }, { id: 2, firstName: "Abel", lastName: "Maclead", email: "[email protected]", updatedDate: new Date(Date.UTC(2021, 2, 20, 0, 0, 0)) }, { id: 3, firstName: "Kiley", lastName: "Caldarera", email: "[email protected]", updatedDate: new Date(Date.UTC(2022, 5, 9, 0, 0, 0)) }, { id: 4, firstName: "Graciela", lastName: "Ruta", email: "[email protected]", updatedDate: new Date(Date.UTC(2020, 2, 19, 0, 0, 0)) }, { id: 5, firstName: "Cammy", lastName: "Albares", email: "[email protected]", updatedDate: new Date(Date.UTC(2023, 6, 18, 0, 0, 0)) }, { id: 6, firstName: "Mattie", lastName: "Poquette", email: "[email protected]", updatedDate: new Date(Date.UTC(2020, 2, 19, 0, 0, 0)) }, { id: 7, firstName: "Meaghan", lastName: "Garufi", email: "[email protected]", updatedDate: new Date(Date.UTC(2024, 2, 9, 0, 0, 0)) }, { id: 8, firstName: "Gladys", lastName: "Rim", email: "[email protected]", updatedDate: new Date(Date.UTC(2020, 2, 19, 0, 0, 0)) }, { id: 9, firstName: "Yuki", lastName: "Whobrey", email: "[email protected]", updatedDate: new Date(Date.UTC(2020, 2, 19, 0, 0, 0)) }, { id: 10, firstName: "Fletcher", lastName: "Flosi", email: "[email protected]", updatedDate: new Date(Date.UTC(2021, 7, 11, 0, 0, 0)) }, { id: 11, firstName: "Minna", lastName: "Amigon", email: "[email protected]", updatedDate: new Date(Date.UTC(2020, 2, 19, 0, 0, 0)) }, { id: 12, firstName: "Abel", lastName: "Maclead", email: "[email protected]", updatedDate: new Date(Date.UTC(2020, 2, 19, 0, 0, 0)) }, ]; /* Renderer date column in the table */ updatedDateRenderer(root: any, column: any, rowData: any) { let container = root.firstElementChild; if (!container) { container = document.createElement('div'); } const options = { weekday: 'long', year: 'numeric', month: 'long', day: 'numeric' }; container.innerText = rowData.item.updatedDate ? rowData.item.updatedDate.toLocaleDateString('en-IN', options) : ''; root.appendChild(container); } } |
5. Route configuration within the ‘app-routing.module.ts’ file.
import { NgModule } from '@angular/core'; import { RouterModule, Routes } from '@angular/router'; import { VaadinTableComponent } from './vaadin-table/vaadin-table.component'; const routes: Routes = [ { path: '', pathMatch: 'full', redirectTo: 'vaadin-table' }, { path: 'vaadin-table', component: VaadinTableComponent } ]; @NgModule({ imports: [RouterModule.forRoot(routes)], exports: [RouterModule] }) export class AppRoutingModule { } |
Folder Structure
UI images


2.7 Nebular
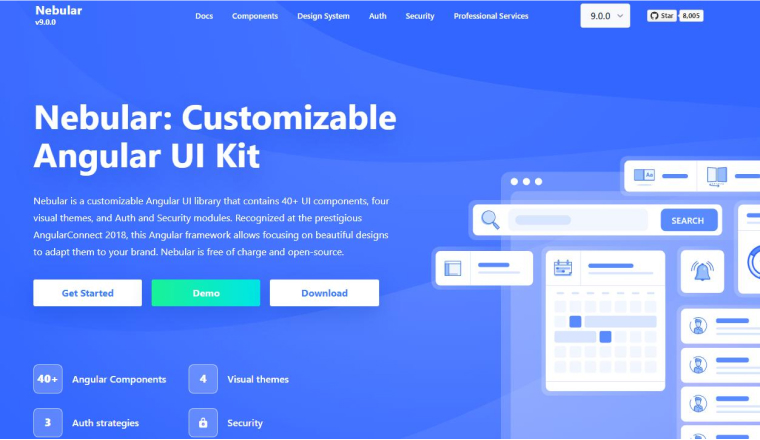
Nebular is a versatile Angular UI component library focused on application design and adaptability. It comprises over 40 UI components, four graphic styles, and a few modules dedicated to authentication and security purposes. You can easily leverage Nebular to design an aesthetically pleasing and responsive user interface without relying on any third-party dependencies.
Nebular Features:
- Authentication layer
- Local support
- Customizable styles
- Free source code distribution with MIT license
- Eva design system
Nebular components:
- Stepper
- Sidebar
- Layouts
- Accordion
- Modals
- Infinite lists
Installation:
With NPM, install the Nebular
//with npm npm i node-teradata |
Usage of Nebular:
1. Create new project “angular-nebular-examples” using below command
ng new angular-nebular-examples cd .\angular-nebular-examples\ |
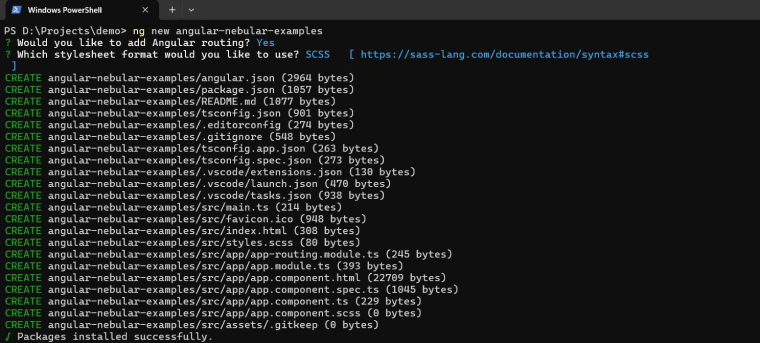
2. Install Nebular
ng add @nebular/theme |

3. Create a new interface
ng generate interface interfaces/user-data |
user-data.ts
export interface UserDataField { id: number; firstName: string; lastName: string; email: string; } export interface UserData { data?: UserDataField; children?: UserData[]; expanded?: boolean; } |
4. Update app component
4.1 app.component.html
<nb-layout> <nb-layout-header fixed>Nebular Table</nb-layout-header> <nb-layout-column> <nb-card> <nb-card-body> <label class="search-label" for="search">Search:</label> <input nbInput [nbFilterInput]="dataSource" id="search" class="search-input"> <table [nbTreeGrid]="dataSource" [nbSort]="dataSource" (sort)="updateSort($event)"> <tr nbTreeGridHeaderRow *nbTreeGridHeaderRowDef="allColumns"></tr> <tr nbTreeGridRow *nbTreeGridRowDef="let row; columns: allColumns"></tr> <ng-container [nbTreeGridColumnDef]="customColumn"> <th nbTreeGridHeaderCell [nbSortHeader]="getSortDirection(customColumn)" *nbTreeGridHeaderCellDef> {{customColumn}} </th> <td nbTreeGridCell *nbTreeGridCellDef="let row"> <nb-tree-grid-row-toggle [expanded]="row.expanded" *ngIf="row.children"></nb-tree-grid-row-toggle> {{row.data.id}} </td> </ng-container> <ng-container *ngFor="let column of defaultColumns; let index = index" [nbTreeGridColumnDef]="column" [showOn]="getShowOn(index)"> <th nbTreeGridHeaderCell [nbSortHeader]="getSortDirection(column)" *nbTreeGridHeaderCellDef> {{column}} </th> <td nbTreeGridCell *nbTreeGridCellDef="let row">{{row.data[column] || '-'}}</td> </ng-container> </table> </nb-card-body> </nb-card> </nb-layout-column> </nb-layout> <router-outlet></router-outlet> |
4.2 app.component.scss
:host nb-tab { padding: 1.25rem; } button[nbTreeGridRowToggle] { background: transparent; border: none; padding: 0; } .search-label { display: block; } .search-input { margin-bottom: 1rem; } .nb-column-name { width: 100%; } @media screen and (min-width: 400px) { .nb-column-name, .nb-column-size { width: 50%; } } @media screen and (min-width: 500px) { .nb-column-name, .nb-column-size, .nb-column-kind { width: 33.333%; } } @media screen and (min-width: 600px) { .nb-column-name { width: 31%; } .nb-column-size, .nb-column-kind, .nb-column-items { width: 23%; } } |
4.3 app.component.ts
import { ChangeDetectionStrategy, Component } from '@angular/core'; import { NbSortDirection, NbSortRequest, NbTreeGridDataSource, NbTreeGridDataSourceBuilder } from '@nebular/theme'; import { UserData, UserDataField } from './interfaces/user-data'; @Component({ selector: 'app-root', changeDetection: ChangeDetectionStrategy.OnPush, templateUrl: './app.component.html', styleUrls: ['./app.component.scss'] }) export class AppComponent { userData: UserData[] = [ { data: { id: 1, firstName: "Minna", lastName: "Amigon", email: "[email protected]" }, children: [ { data: { id: 1, firstName: "Kiley", lastName: "Caldarera", email: "[email protected]" } } ] }, { data: { id: 2, firstName: "Abel", lastName: "Maclead", email: "[email protected]" }, children: [ { data: { id: 1, firstName: "Kiley", lastName: "Caldarera", email: "[email protected]" } } ] }, { data: { id: 3, firstName: "Kiley", lastName: "Caldarera", email: "[email protected]" }, children: [ { data: { id: 1, firstName: "Kiley", lastName: "Caldarera", email: "[email protected]" } } ] }, { data: { id: 4, firstName: "Graciela", lastName: "Ruta", email: "[email protected]" } }, { data: { id: 5, firstName: "Cammy", lastName: "Albares", email: "[email protected]" } }, ]; customColumn = 'id'; defaultColumns = ['firstName', 'lastName', 'email']; allColumns = [this.customColumn, ...this.defaultColumns]; dataSource!: NbTreeGridDataSource<UserDataField>; sortColumn!: string; sortDirection: NbSortDirection = NbSortDirection.NONE; constructor(private dataSourceBuilder: NbTreeGridDataSourceBuilder<UserDataField>) { this.dataSource = this.dataSourceBuilder.create(this.userData); } updateSort(sortRequest: NbSortRequest): void { this.sortColumn = sortRequest.column; this.sortDirection = sortRequest.direction; } getSortDirection(column: string): NbSortDirection { if (this.sortColumn === column) { return this.sortDirection; } return NbSortDirection.NONE; } getShowOn(index: number) { const minWithForMultipleColumns = 400; const nextColumnStep = 100; return minWithForMultipleColumns + (nextColumnStep * index); } } |
5. Update app.module.ts file.
import { CUSTOM_ELEMENTS_SCHEMA, NO_ERRORS_SCHEMA, NgModule } from '@angular/core'; import { BrowserModule } from '@angular/platform-browser'; import { AppRoutingModule } from './app-routing.module'; import { AppComponent } from './app.component'; import { NbCardModule, NbInputModule, NbLayoutModule, NbSidebarModule, NbSidebarService, NbSpinnerModule, NbStatusService, NbTabsetModule, NbThemeModule, NbTreeGridModule } from '@nebular/theme'; @NgModule({ declarations: [ AppComponent ], imports: [ BrowserModule, AppRoutingModule, NbTabsetModule, NbLayoutModule, NbSidebarModule, NbCardModule, NbInputModule, NbLayoutModule, NbTreeGridModule, NbSpinnerModule, NbThemeModule.forRoot({ name: 'default' }), ], providers: [NbStatusService,NbSidebarService], bootstrap: [AppComponent], }) export class AppModule { } |
Folder Structure
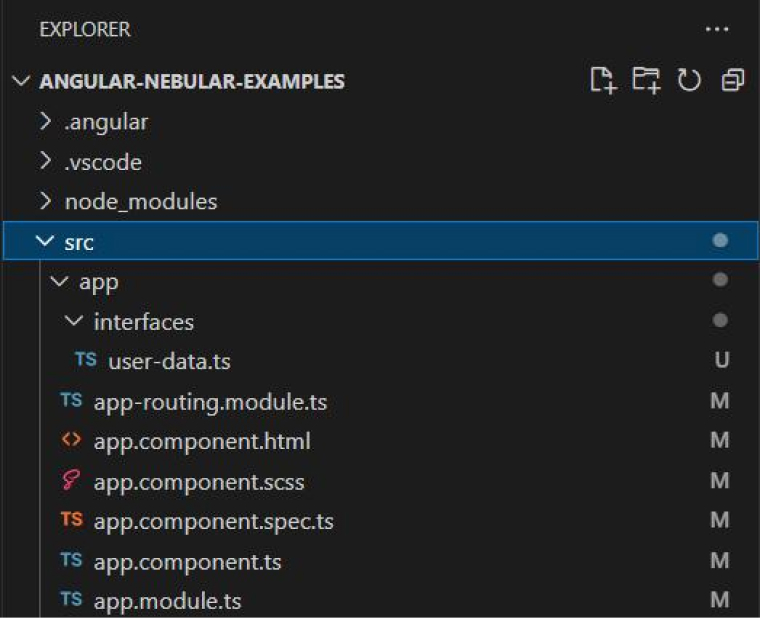
UI images


2.8 PrimeNG
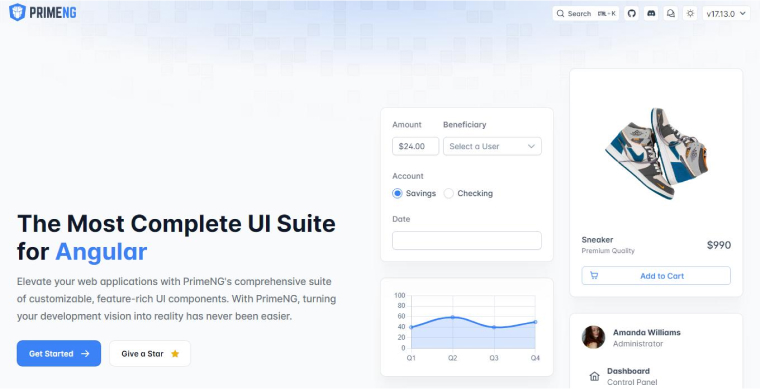
Regarded as one of the most dynamic Angular component libraries, PrimeNG consists of more than 80 UI components. This open-source library offers responsive and mobile-friendly themes as well as easy-to-customize templates. Numerous advanced components from PrimeNG help developers to elevate user experience.
Features of PrimeNG:
- Theme designer
- Customizable templates
- More than 280 UI blocks
- Updated regularly
- Vibrant and supportive community
- Mobile optimized components
PrimeNG components:
- Charts
- Panel
- Menus
- Dropdown
- KeyFilter
- ListBox
- Rating
Installation:
Use NPM or Yram to install the PrimeNG.
// with npm npm i primeng // with yarn yarn add primeng |
Usage of PrimeNG:
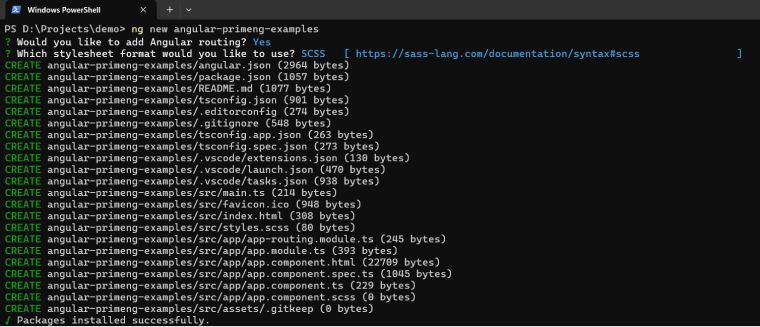
1. Create new project “angular-material-examples” using below command
ng new angular-primeng-examples cd .\angular-primeng-examples\ |
2. Install primeng
ng add primeng |

3. Create a new interface
ng generate interface interfaces/user-data |
user-data.ts
export interface UserData { id: number; firstName: string; lastName: string; status: boolean; email: string; } export interface Statuses { label: string; value: boolean; } |
4. Update app component
4.1 app.component.html
<div class="card"> <p-table #dt1 [value]="userData" dataKey="id" [globalFilterFields]="['firstName','lastName', 'email']" [rows]="5" [showCurrentPageReport]="true" [rowsPerPageOptions]="[5, 10, 25, 50]" [loading]="loading" [paginator]="true" currentPageReportTemplate="Showing {first} to {last} of {totalRecords} entries"> <ng-template pTemplate="caption"> <div class="flex"> <button pButton label="Clear" class="p-button-outlined" icon="pi pi-filter-slash" (click)="clear(dt1)"></button> <span class="p-input-icon-left ml-auto"> <i class="pi pi-search"></i> <input pInputText type="text" [(ngModel)]="filter" (input)="dt1.filterGlobal(filter, 'contains')" placeholder="Search keyword" /> </span> </div> </ng-template> <ng-template pTemplate="header"> <tr> <th style="min-width:15rem"> <div class="flex align-items-center"> First Name <p-columnFilter type="text" field="firstName" display="menu"></p-columnFilter> </div> </th> <th style="min-width:15rem"> <div class="flex align-items-center"> Last Name <p-columnFilter type="text" field="lastName" display="menu"></p-columnFilter> </div> </th> <th style="min-width:15rem"> <div class="flex align-items-center"> Email <p-columnFilter type="text" field="email" display="menu"></p-columnFilter> </div> </th> <th style="min-width:10rem"> <div class="flex align-items-center"> Status <p-columnFilter field="status" matchMode="equals" display="menu"> <ng-template pTemplate="filter" let-value let-filter="filterCallback"> <p-dropdown [ngModel]="value" [options]="statuses" (onChange)="filter($event.value)" placeholder="Any"> <ng-template let-option pTemplate="item"> <p-tag [value]="option.label"></p-tag> </ng-template> </p-dropdown> </ng-template> </p-columnFilter> </div> </th> </tr> </ng-template> <ng-template pTemplate="body" let-user> <tr> <td> {{ user.firstName }} </td> <td> {{ user.lastName }} </td> <td> {{ user.email }} </td> <td> <p-tag [value]="user.status? 'Active': 'Inactive'"></p-tag> </td> </tr> </ng-template> <ng-template pTemplate="emptymessage"> <tr> <td colspan="7">No user found.</td> </tr> </ng-template> </p-table> </div> <router-outlet></router-outlet> |
4.2 app.component.scss
:host ::ng-deep { .p-progressbar { height: .5rem; background-color: #D8DADC; .p-progressbar-value { background-color: #607D8B; } } } |
4.3 app.component.ts
import { Component, OnInit } from '@angular/core'; import { Table } from 'primeng/table'; import { Statuses, UserData } from './interfaces/user-data'; @Component({ selector: 'app-root', templateUrl: './app.component.html', styleUrls: ['./app.component.scss'] }) export class AppComponent implements OnInit { userData: UserData[] = [ { id: 1, firstName: "Minna", lastName: "Amigon", status: true, email: "[email protected]" }, { id: 2, firstName: "Abel", lastName: "Maclead", status: true, email: "[email protected]" }, { id: 3, firstName: "Kiley", lastName: "Caldarera", status: true, email: "[email protected]" }, { id: 4, firstName: "Graciela", lastName: "Ruta", status: true, email: "[email protected]" }, { id: 5, firstName: "Cammy", lastName: "Albares", status: true, email: "[email protected]" }, { id: 6, firstName: "Mattie", lastName: "Poquette", status: true, email: "[email protected]" }, { id: 7, firstName: "Meaghan", lastName: "Garufi", status: true, email: "[email protected]" }, { id: 8, firstName: "Gladys", lastName: "Rim", status: true, email: "[email protected]" }, { id: 9, firstName: "Yuki", lastName: "Whobrey", status: true, email: "[email protected]" }, { id: 10, firstName: "Fletcher", lastName: "Flosi", status: false, email: "[email protected]" }, { id: 11, firstName: "Minna", lastName: "Amigon", status: true, email: "[email protected]" }, { id: 12, firstName: "Abel", lastName: "Maclead", status: true, email: "[email protected]" }, ]; statuses: Statuses[] =[ { label: 'Active', value: true }, { label: 'Inactive', value: false }, ]; loading: boolean = true; filter!: string; constructor() { } ngOnInit() { this.loading = false; } clear(table: Table) { this.filter = '' table.clear(); } } |
5. Update app.module.ts’ file.
import { NgModule } from '@angular/core'; import { BrowserModule } from '@angular/platform-browser'; import { AppRoutingModule } from './app-routing.module'; import { AppComponent } from './app.component'; import { TableModule } from 'primeng/table'; import { MultiSelectModule } from 'primeng/multiselect'; import { FormsModule } from '@angular/forms'; import { TagModule } from 'primeng/tag'; import { ProgressBarModule } from 'primeng/progressbar'; import { SliderModule } from 'primeng/slider'; import { ButtonModule } from 'primeng/button'; import { DropdownModule } from 'primeng/dropdown'; import { HttpClientModule } from '@angular/common/http'; import { InputTextModule } from 'primeng/inputtext'; import { BrowserAnimationsModule } from '@angular/platform-browser/animations'; @NgModule({ declarations: [ AppComponent ], imports: [ FormsModule, BrowserModule, AppRoutingModule, TableModule, MultiSelectModule, TagModule, ProgressBarModule, SliderModule, ButtonModule, DropdownModule, HttpClientModule, InputTextModule, BrowserAnimationsModule ], providers: [ ], bootstrap: [AppComponent] }) export class AppModule { } |
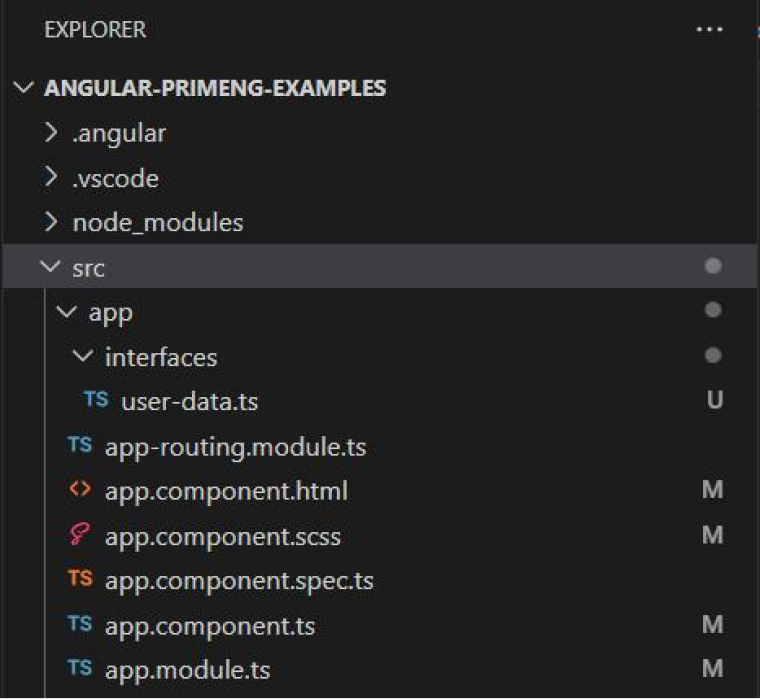
Folder Structure
UI images


3. Conclusion
Now that you have reached here, we hope that we can deliver the right information and insightful content on the best component libraries that can assist you in your web development project. These popular Angular UI component libraries offer lightning design systems, flexible themes, custom components, and overall good native angular components. If your business has dynamic thinking, these components and comprehensive web frameworks will deliver best-in-class products. Choose what suits your business apps the best, and your angular developer team will be able to work on different user interfaces for different project teams.



Comments
Leave a message...