Related Blogs
Table of Content
- What is SonarQube?
- What is Jenkins?
- Steps to Install SonarQube and Jenkins in Your System or Machine
- Step I: Install Java SDK
- Step II: Setup Environment Variable to Your Java Installation Directory
- Step III: Install SonarQube
- Step IV: Start SonarQube
- Step V: Access SonarQube Server Configuration
- Step VI: Integrate Jenkins
- Step VII: Configure the Jenkins with SonarQube
- Step VIII: Find SonarQube Scanner
- Step IX: Download SonarScanner
- Steps to Follow in .NET Framework Based Projects
- Conclusion
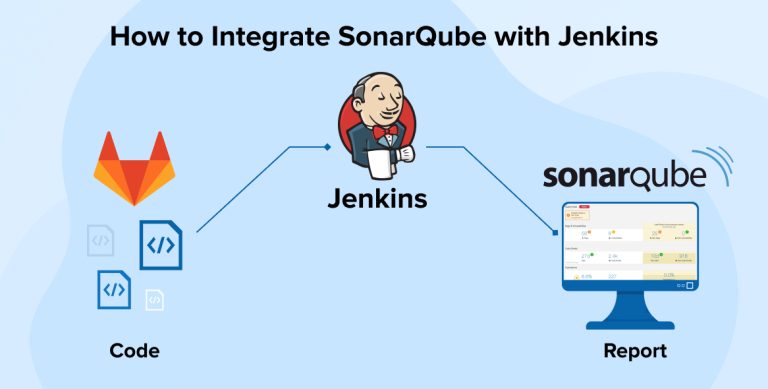
The tech world is full of possibilities and enhancements for businesses to have a competitive edge with technology. Everyday enhancement simplifies developers’ tasks. Let’s assume a situation where Developers have committed their codes to the repository, and then they want to know the project source code quality, code smells, any bugs, vulnerabilities, code analysis, etc. So it is extremely challenging for them to know all this information. So what if they want all these source codes and information beforehand? For such cases, Jenkins is the best fit. For every software development company who wants to build a new project, then the source code is automatically or manually saved using Jenkins and their daily commit operation is not needed every time.
For this purpose, we can go for CI/CD i.e. Continuous Integration &Continuous Deployment of the code using SonarQube-Jenkins Integration.
1. What is SonarQube?
SonarQube is an open-source platform, which is used for continuous analysis of source code quality by performing analysis on your code to detect duplications, bugs, security vulnerabilities and code smells on programming languages.
2. What is Jenkins?
Jenkins- an open-source automation tool is created using Java programming language. For the initial setup, it facilitates users with CI/CD(continuous integration (CI) or continuous delivery) technique that simplifies the use and management of processes. It is fundamentally focused on continuously building and testing software projects for developers and to implement changes in real-time. In addition, it also allows users to plan a new build whenever the need arises.
Below image shows the architecture diagram which shows an overview of how the Sonarqube will be integrated into the Jenkins build pipeline.

Architecture of Sonarqube-Jenkins integration as a Continuous code inspection tool
3. Steps to Install SonarQube and Jenkins in Your System or Machine
Let’s have a look at the detailed step by step guide to Install SonarQube and Jenkins in Your System
Step I: Install Java SDK
It is mandatory to install Java SDK on your machine before you decide to install SonarQube. And Java SDK is also needed for the Jenkins automation server running on your machine.
If you don’t have java SDK on your machine then you install Java SDK it by clicking the link.
After installing the Java SDK in your machine or server then you can verify it by opening the command prompt and type java –version as shown in the below image.

Step II: Setup Environment Variable to Your Java Installation Directory
Once the installation of Java SDK is completed, there is a need to set up variables in the Java environment.
You can refer to the link below, which explains the steps in order to set up Java Home variables in your machine.
Step III: Install SonarQube
Now the next step is to install the Sonarqube community edition which is free by using the link below
As per our expertise, we would recommend to opt for developer’s edition because of its advanced functionalities and features. But if you are a beginner, go for a community edition.
Unzip the downloaded package and then place the extracted files in your preferred folder. Let say C:\sonarqub
Step IV: Start SonarQube
Navigate to the folder sonarqube/conf folder in that you there is a file called wrapper.conf, there you have to the path for the java else you’ll receive an error message show – unable to start JVM
Set %JAVA_HOME%/bin/java to the property wrapper.java.command
After this, go to the folder named windows under the bin folder and run a bat file called startsonar in an administrator user mode. Wait for a few minutes, and then if everything works perfectly.After this step, you will receive a console message as shown in the screenshot with an output message that says “SonarQube is Up”

If you want to install Sonarqube for software testing service then you have to execute the bat file called Installntservice and then execute the other bat file called Startntserver in that order to start the service.
There is a bat file called Stopntservice, you can click on this file when you want to stop the service and then there is another file called UninstallNTService.bat to uninstall the service in your server.
Step V: Access SonarQube Server Configuration
When the sonarqube service is up, then you should be able to access the sonarqube dashboard in your browser by accessing localhost:9000
There will be a pop-up window asking for username and password to login.
Put username- admin, password – admin
Now, select the administration section where there are options available to configure access and make changes in user responsibilities.
Step VI: Integrate Jenkins
To Integrate the Jenkins DevOps environment with sonarqube installation is to generate an access token.
Now generate token with an appropriate name, which is under Administration/Security/Users/Tokens
This generated token will be later used in Jenkins for Sonar authentication.


Step VII: Configure the Jenkins with SonarQube
Then we have to configure the Jenkins with Sonarqube installations by using the generated access tokens in Step VI.
Put the server URL as http://localhost:9000 under then manage Jenkins / go to sonarqube servers section / add sonarqube.
For special cases, where if the server is installed on the same machine, or if the server is installed separately or in third scenario if the entire port is different for the server, then in all the three cases, the user needs to put the accurate server URL/ click on add option to create a secret text link. Then add the generated server authentication token as a secret key and save the whole operation.


Step VIII: Find SonarQube Scanner
After successfully completing integration proceIntegration.ss we need to install the sonar scanner which goes through the code and analysis. SonarScanner lets users centralize the configuration of SonarQube server connection details in Jenkins global tool configuration.
Click on download now and install then click on the after restart link which is available under the manage Jenkins/manage plugins/go to the available section/ search for sonarqube scanner and install.
Now go to Global Tool configuration under Manage Jenkins, then follow the below steps,
Finally, click on the Global Tool configuration under section Manage Jenkins, then keep following the below-mentioned steps. SonarScanner by MSBuild must be installed for all .NET framework related projects. Set name for the scanner and select the matching SonarScanner for MSBuild version.

Step IX: Download SonarScanner
Depending upon your project you can download the sonarscanner. To find out the ideal SonarScanner for your build.
So after the previous steps of the basic Sonarqube integration process now it’s time to move to the next section. Let’s discuss how to integrate Sonarscanner into the build pipeline for .NET.
5. Steps to Follow in .NET Framework Based Projects
- We have to first configure the sonarqube scanner.
- Now go to the global to configuration option in manage Jenkins, in the sonarscanner for MSBuild installation -> give a name for the scanner -> and select the correct MSBuild version of your project.

- You have to select the right sonarscanner for the MSBuild version that matches your project. Click apply & save. Click on the relevant projects and then into the build pipeline for further configuration.
- Select the option to add a build step for sonarscanner for MSBuild begin sonarqube analysis and put it at the starting position of the build pipeline as shown in the below screenshot.

- Put the sonarscanner for MSBuild and then end analysis as shown in the below screenshot.
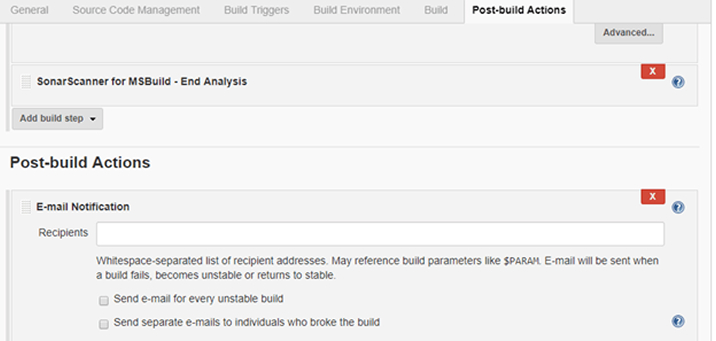
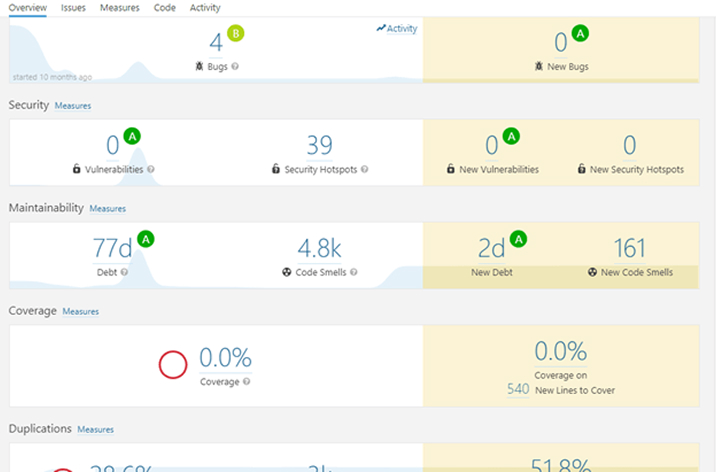
- Now run the build and check whether it gets successfully built or not. Lastly, do a final visit on SonarQube portal to check if the selected project is visible on the dashboard or not. When the build & integration gets successful, you’ll see the dashboard of the analysis overview as shown in the below screenshot.
6. Conclusion
To sum up, we hope that we were able to help you install SonarQube without any hurdles. This blog was intended to educate users on how to step by step install the SonarQube. Here, we have shown all the possible steps for how to install and integrate SonarQube with Jenkins and setting up the process for .NET based projects.

Vishal Shah
Vishal Shah has an extensive understanding of multiple application development frameworks and holds an upper hand with newer trends in order to strive and thrive in the dynamic market. He has nurtured his managerial growth in both technical and business aspects and gives his expertise through his blog posts.
Related Service
Custom Software Development
Know more about Custom Software Development Service
Learn MoreSubscribe to our Newsletter
Signup for our newsletter and join 2700+ global business executives and technology experts to receive handpicked industry insights and latest news
Build your Team
Want to Hire Skilled Developers?



Comments
Leave a message...